Consume Web API Put method in ASP.NET MVC
In the previous two sections, we learned how to consume Web API Get and Post methods in the ASP.NET View. Here, we will see how to consume Put method of Web API to update an existing record.
We already created Web API with Put method that handles HTTP PUT request in the Implement Put Method section as below.
public class StudentController : ApiController
{
public StudentController()
{
}
public IHttpActionResult Put(StudentViewModel student)
{
if (!ModelState.IsValid)
return BadRequest("Not a valid data");
using (var ctx = new SchoolDBEntities())
{
var existingStudent = ctx.Students.Where(s => s.StudentID == student.Id).FirstOrDefault<Student>();
if (existingStudent != null)
{
existingStudent.FirstName = student.FirstName;
existingStudent.LastName = student.LastName;
ctx.SaveChanges();
}
else
{
return NotFound();
}
}
return Ok();
}
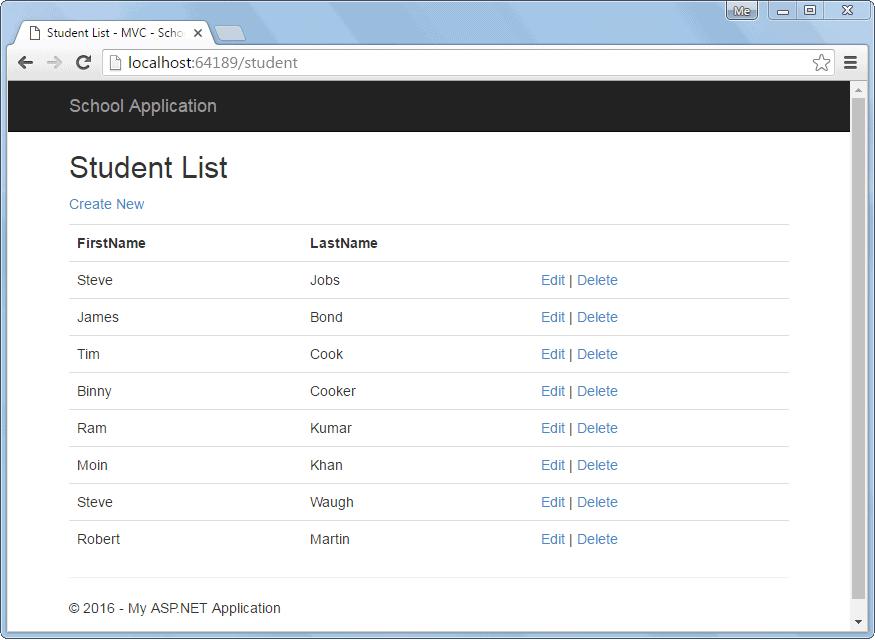
}We created Student List view in the previous section as below. In the below view there is an edit link for each record to edit that particular record. We will handle edit functionality in this section.
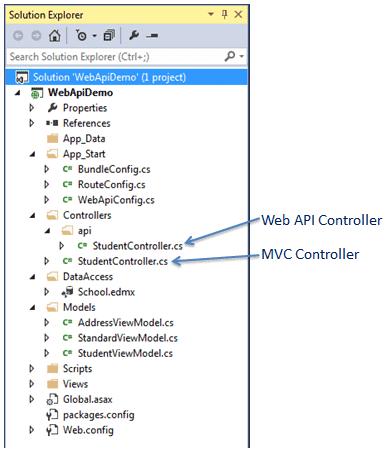
The following is a Web API + MVC project structure created in the previous sections. We will add necessary classes in this project.
We have already created the following StudentViewModel class under Models folder.
public class StudentViewModel
{
    public int Id { get; set; }
    public string FirstName { get; set; }
    public string LastName { get; set; }

    public AddressViewModel Address { get; set; }

    public StandardViewModel Standard { get; set; }
}
So let's consume Web API Put method by implementing edit functionality.
Step 1:
In the above Student List view, when user clicks on the Edit link it will send HTTP GET request http://localhost:64189/student/edit/{id} to the MVC controller. So, we need to add HttpGet action method "Edit" in the StudentController to render an edit view as shown below.
public class StudentController : Controller
{
    public ActionResult Index()
    {
        //consume Web API Get method here..

        return View();
    }

    public ActionResult Edit(int id)
    {
        StudentViewModel student = null;

        using (var client = new HttpClient())
        {
            client.BaseAddress = new Uri("http://localhost:64189/api/");
            //HTTP GET
            var responseTask = client.GetAsync("student?id=" + id.ToString());
            responseTask.Wait();

            var result = responseTask.Result;
            if (result.IsSuccessStatusCode)
            {
                var readTask = result.Content.ReadAsAsync<StudentViewModel>();
                readTask.Wait();

                student = readTask.Result;
            }
        }

        return View(student);
    }
}
As you can see above, Edit() action method includes id parameter. This id parameter will be bound to the query string id parameter. We use this id to get a student record from the database using HttpClient and pass the student record in the edit view. Visit HttpClient section to know more about it.
Step 2:
Create edit view by right clicking in the above Edit action method and select Add View.. This will open Add View popup as shown below.
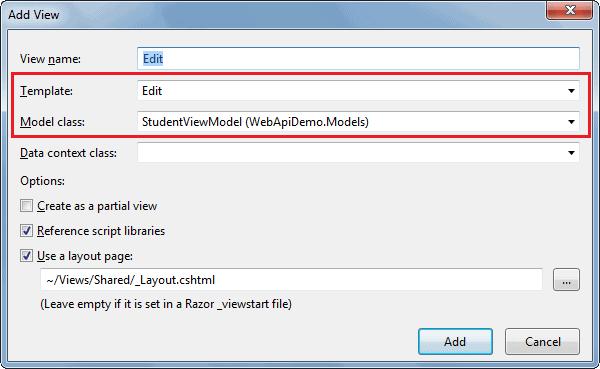
In the Add View popup, select Edit template and StudentViewModel as a model class as shown above. Click Add button to generate Edit.cshtml view in the Views > Student folder as shown below.
@model WebApiDemo.Models.StudentViewModel
@{
ViewBag.Title = "Edit Student - MVC";
Layout = "~/Views/Shared/_Layout.cshtml";
}
<h2>Edit Student</h2>
@using (Html.BeginForm())
{
@Html.AntiForgeryToken()
<div className="form-horizontal">
<hr />
@Html.ValidationSummary(true, "", new { @class = "text-danger" })
@Html.HiddenFor(model => model.Id)
<div className="form-group">
@Html.LabelFor(model => model.FirstName, htmlAttributes: new { @class = "control-label col-md-2" })
<div className="col-md-10">
@Html.EditorFor(model => model.FirstName, new { htmlAttributes = new { @class = "form-control" } })
@Html.ValidationMessageFor(model => model.FirstName, "", new { @class = "text-danger" })
</div>
</div>
<div className="form-group">
@Html.LabelFor(model => model.LastName, htmlAttributes: new { @class = "control-label col-md-2" })
<div className="col-md-10">
@Html.EditorFor(model => model.LastName, new { htmlAttributes = new { @class = "form-control" } })
@Html.ValidationMessageFor(model => model.LastName, "", new { @class = "text-danger" })
</div>
</div>
<div className="form-group">
<div className="col-md-offset-2 col-md-10">
<input type="submit" value="Save" className="btn btn-default" />
</div>
</div>
</div>
}
<div>
@Html.ActionLink("Back to List", "Index")
</div>In the above view, Html.BeginForm() generates HTML form tag <form> action="/Student/edit" method="post" </form> which will send post request when user clicks on the save button.
Now, it will display following Student List view when you run the project by pressing Ctrl + F5.
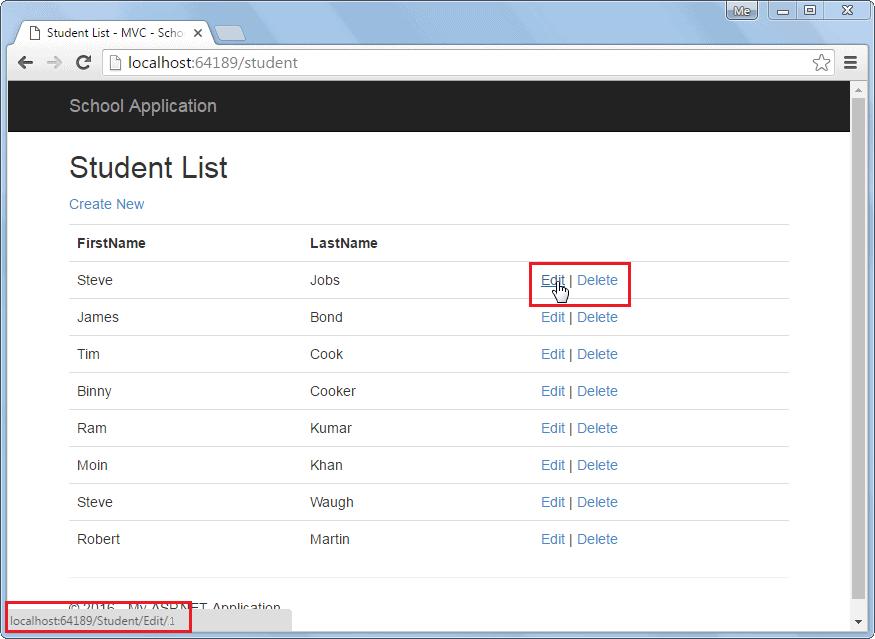
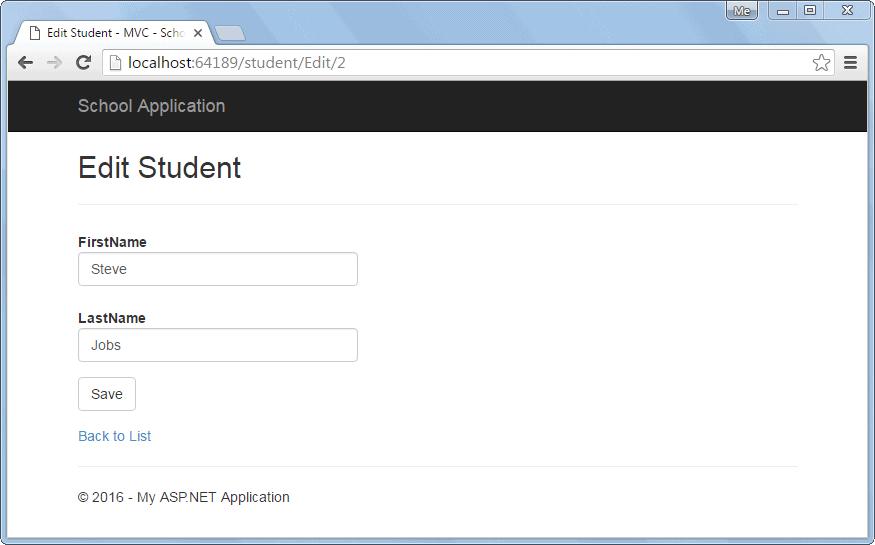
It will display following edit view when you click on the Edit link in the above view.
Now, implement HttpPost Edit action method which will be executed when user clicks on the Save button above.
Step 3:
Add HttpPost action method in StudentController of MVC which will send HTTP PUT request to Web API to update current record.
public class StudentController : Controller
{
    public ActionResult Edit(int id)
    {
        StudentViewModel student = null;

        using (var client = new HttpClient())
        {
            client.BaseAddress = new Uri("http://localhost:64189/api/");
            //HTTP GET
            var responseTask = client.GetAsync("student?id=" + id.ToString());
            responseTask.Wait();

            var result = responseTask.Result;
            if (result.IsSuccessStatusCode)
            {
                var readTask = result.Content.ReadAsAsync<StudentViewModel>();
                readTask.Wait();

                student = readTask.Result;
            }
        }
        return View(student);
    }

    [HttpPost]
    public ActionResult Edit(StudentViewModel student)
    {
        using (var client = new HttpClient())
        {
            client.BaseAddress = new Uri("http://localhost:64189/api/student");

            //HTTP POST
            var putTask = client.PutAsJsonAsync<StudentViewModel>("student", student);
            putTask.Wait();

            var result = putTask.Result;
            if (result.IsSuccessStatusCode)
            {

                return RedirectToAction("Index");
            }
        }
        return View(student);
    }
}
As you can see above, HttpPost Edit action method uses HttpClient to send HTTP PUT request to the Web API with updated student record. Visit HttpClient section to learn more about it.
So in this way we can consume Put method of Web API to execute HTTP PUT request to edit an existing record.
Next, consume Delete method of Web API to delete a record in the data source.