Sass - Setup Development Environment
In the previous chapter, you learned about Sass and its transpiler. Here, you will learn to set up development environment for Sass.
The Sass transpiler uses Ruby, which isn't installed by default in Windows, so that's the first thing we need to do.
Installing Ruby
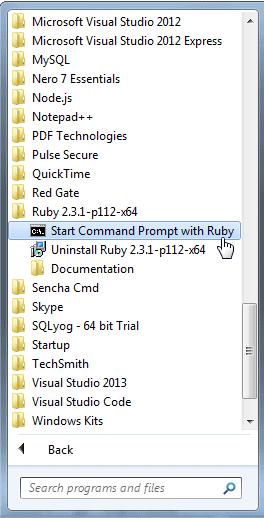
To install Ruby, download and run the latest stable version of Ruby installer for Windows from rubyinstaller.org. As part of the installation, the installer will add a "Start Command Prompt with Ruby" shortcut to your start menu. (You'll find it in the Ruby folder.)
Use the above command prompt with ruby to run all the commands for sass.
Installing Sass
To install the Sass transpiler, open a command window. On Windows, use the "Start Command Prompt with Ruby" shortcut. On a Mac, use the Terminal program. (You'll find it in the Utilities folder.)
Once your command window is open, execute the following command:
gem install sass
On Windows, you might get a confirmation dialog. Just say yes.
On either system, depending on your security settings, you might get an error message. If that happens, try this command instead:
sudo gem install sass
Testing Sass
Let's try a couple of things to make sure everything's working. First, execute the following command:
sass -v
After a moment or two, you should see the version of Sass installed on your system (that's what the -v switch means).
Now let's try some actual Sass code. Fire up your editor and create a new file named test.scss (The .scss extension is one of two file extensions used for Sass files. We'll talk about that in a bit more detail in the next chapter.)
Enter the following code, and save the file.
$primary : #434433;

html {
  text-color: $primary;
}
Now go back to your command window, make sure you're in the folder where you created the file, and execute the following command:
sass test.scss test.css
The Sass transpiler will create the test.css file. If you open it in your editor (or just type it out in your command window), it should look like this:
html {
  text-color: #434433;
}
Congratulations! You've just written your first piece of Sass code and transpiled it into CSS.
Watching Sass Files & Folders
You can always transpile a single Sass file using the command syntax we just tried:
sass <input-file> <output-file>
But that can get tedious fast. The chances are good that whatever code editor you use will handle the transpilation process for you, either natively or via an editor extension. Extensions are available for most of the popular editors, including Visual Studio Code and Atom. It's worth checking out, because integrated transpilation makes the whole process seamless.
If you use any workflow automation tool such as Grunt or Gulp, you can include the transpilation process in your task file. Again, it makes the process seamless, and the fewer things you need to think about when you're coding, the better, right?
Any of these techniques will work for the examples and exercises in this tutorial, but for the sake of simplicity, we'll use the most basic: the command line. The installation process is a little different depending on whether you're using Windows or a Mac, but once Sass is installed, everything will work the same, whatever editor or operating system you're using.
If you are not using any of the automation tool then you can also tell the transpiler to watch a single file or an entire folder using the --watch flag:
sass --watch input:output
Note that this syntax is a little different: the input and output values are separated by a colon rather than a space. So, for example, to tell the transpiler to re-create test.css every time test.scss changes, you'd execute the following command:
sass --watch test.scss:test.css
Of course, you'll usually have more than one file in your project. In that case, it's more efficient to have Sass watch an entire folder. Since you don't need to deploy the Sass files, it's best practice to put the CSS files in a different folder, so in most cases, you'll tell the transpiler to watch an entire folder, using syntax like this:
sass --watch project/sass:project/stylesheets
where project/sass is of course wherever you're putting your Sass files during development and project/stylesheets is wherever you're putting your CSS files for deployment.
Most of the time all you'll need Sass to do is transpile a file or a folder of files, but it does have some other switches. You can check them out by typing sass --help at the command line.