Install SQL Server & SSMS
In this article, you will learn to install SQL Server 2019 and SQL Server Management Studio.
SQL Server 2019 can be installed on Windows, Linux, or Docker. Here, we will install it on Windows.
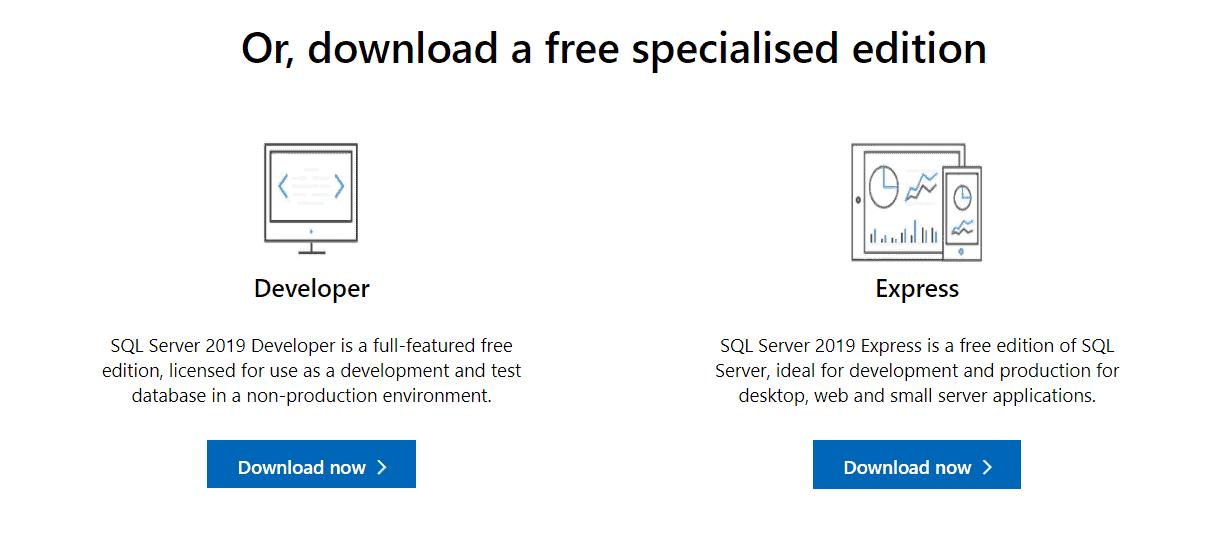
Microsoft provides two free editions of SQL Server: Developer and Express edition.
Developer edition is free and has all the features of the Enterprise edition. It can be used to create a large database with all the features but for a non-production environment.
Express edition is an entry-level free database for building desktop applications and small web or data-driven server applications up to 10GB in size.
Here, we will download and install the free express edition so that you can learn and test SQL Server basic features. You can also choose the Developer edition to install if you want to test enterprise-level features. The installation steps would remain the same.
Pre-requisites for Installing SQL Server 2019:
- Minimum of 6GB free hard disk space
- Minimum 1GB memory (Recommended at least 4 GB RAM in development environment).
- Windows 10 TH1 1507 or greater
- Windows Server 2016 or greater
Install SQL Server
First of all, download the latest version of the SQL Server Express edition from microsoft.com.
When you open the page, scroll down and click on the Download button to download the installer file.
Double click on the installer file (SQL2019-SSEI-Expr.exe) to run it or go to your system's download folder and double click the SQL2019-SSEI-Expr.exe file to start installing.
A dialog box appears asking, "Do you want to allow this App to make changes to this device". Click Yes to start the installation wizard.
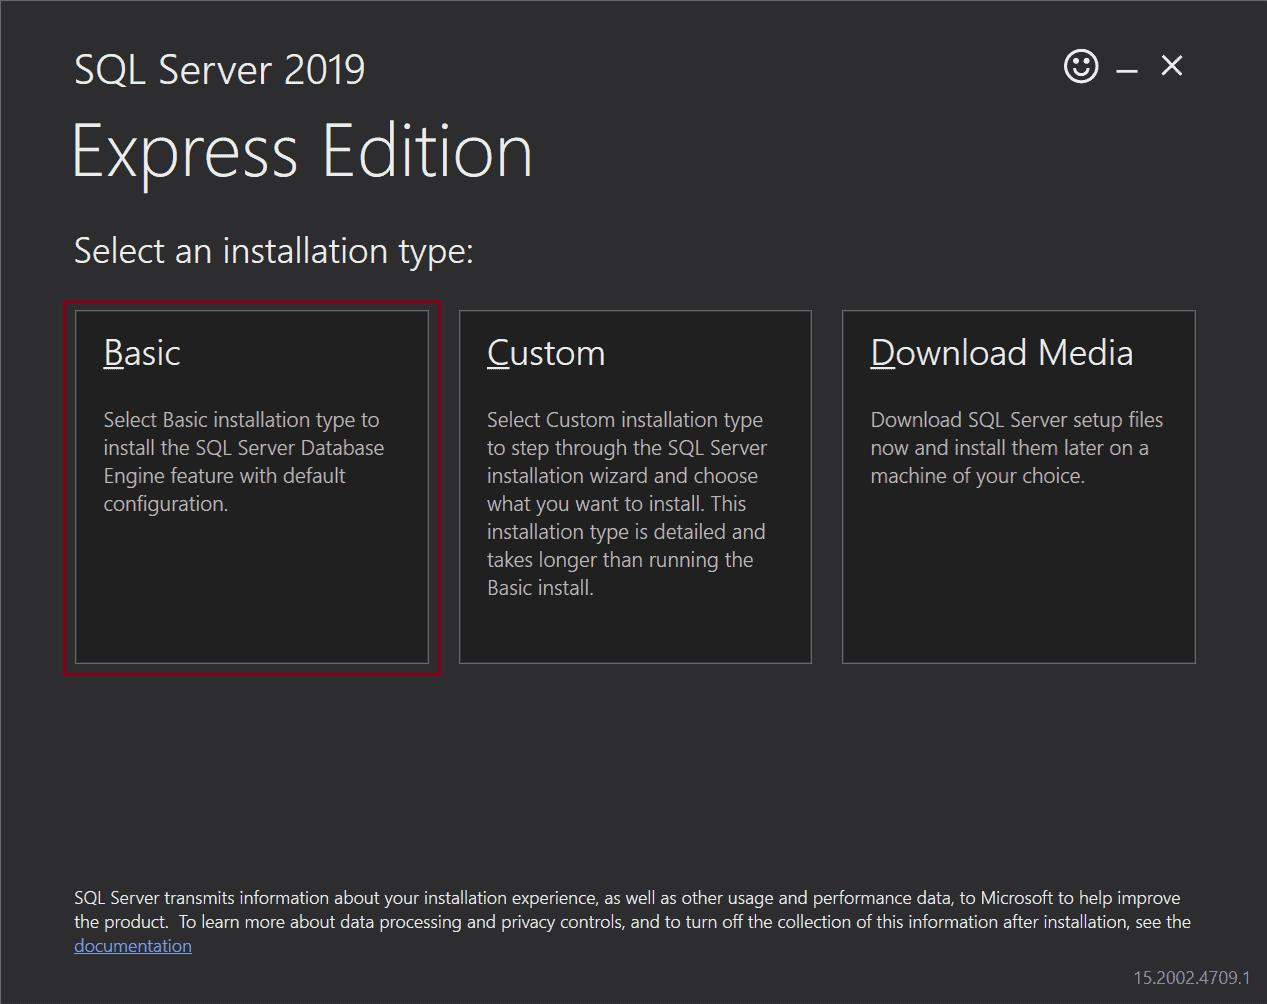
On the installation wizard, select the Basic installation type, as shown below. This would install all the necessary features with the default configurations.
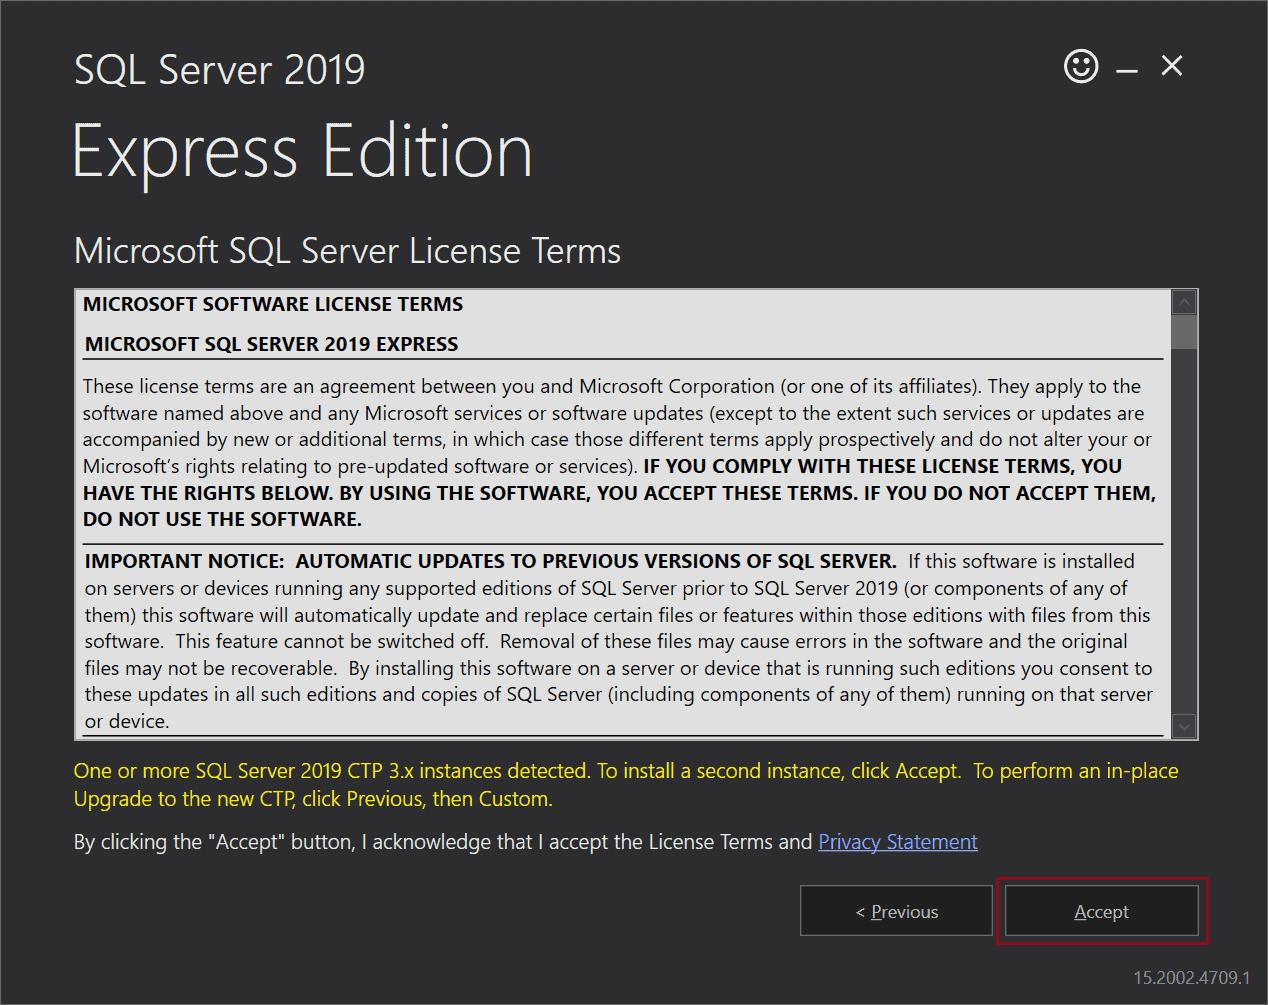
Next, read through the Microsoft SQL Server Licence terms and click on the Accept button.
After you accept the licensing terms, the installation wizard asks you to select the location to install SQL Server in your system. Click the browse button and select a location of your choice or let the location be at the default "C:\Program Files\Microsoft SQL Server".
Notice that on the right-hand side, the wizard displays the minimum free space required and the download size of SQL Server.

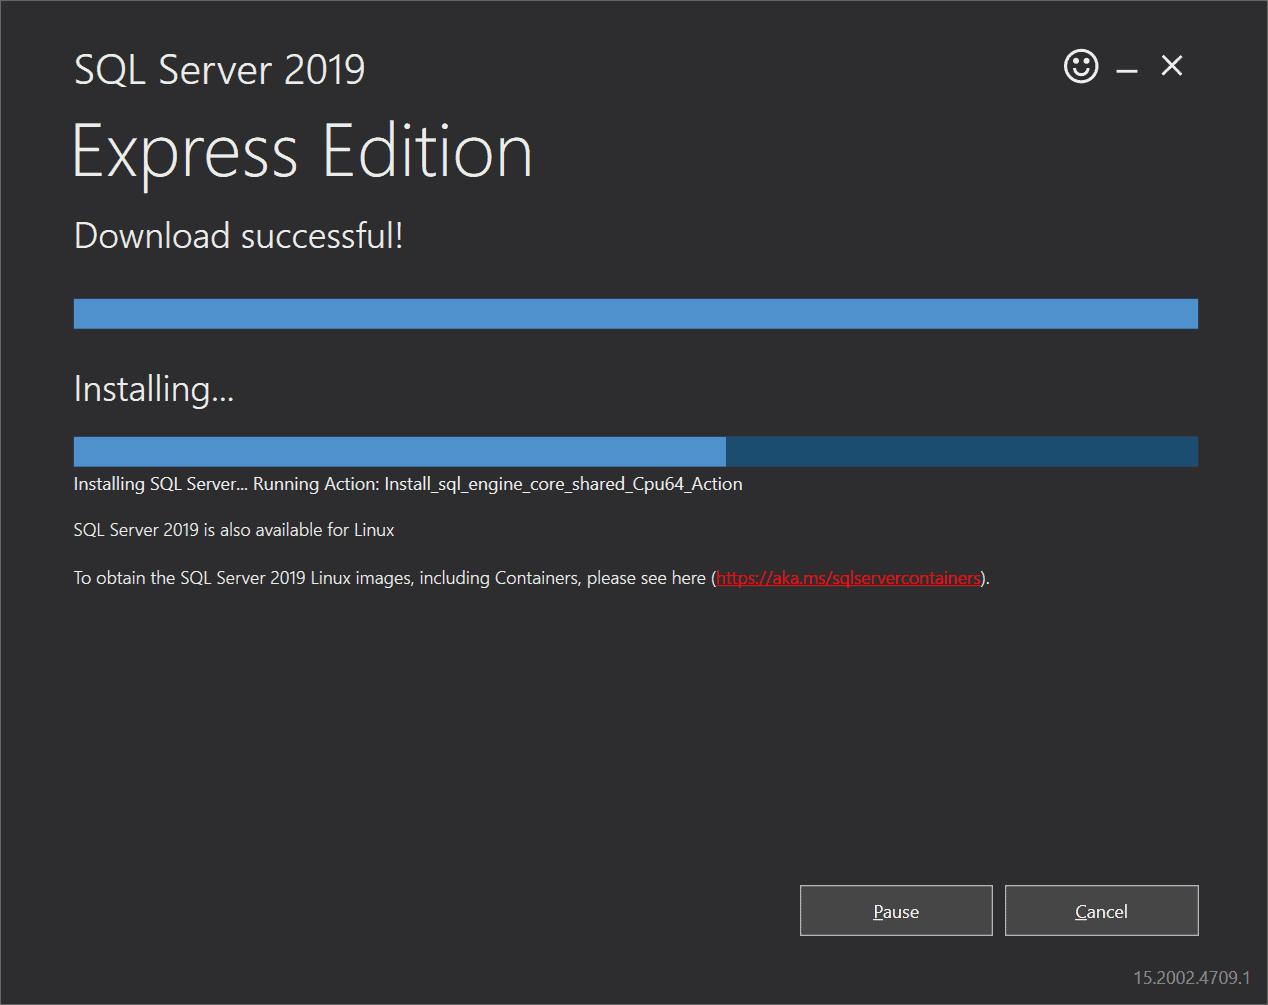
Click on the Install button. This will start downloading the required packages for SQL Server. Once the download is complete, the installation begins, as shown below.
Once the installation is completed successfully, it will display the important configuration details such as SQL Server instance name (defaults to SQLEXPRESS), SQL Administrators (defaults to <computer name>\<user name>), Installed Version, connection string to connect with this instance, log file location, etc., as shown below.
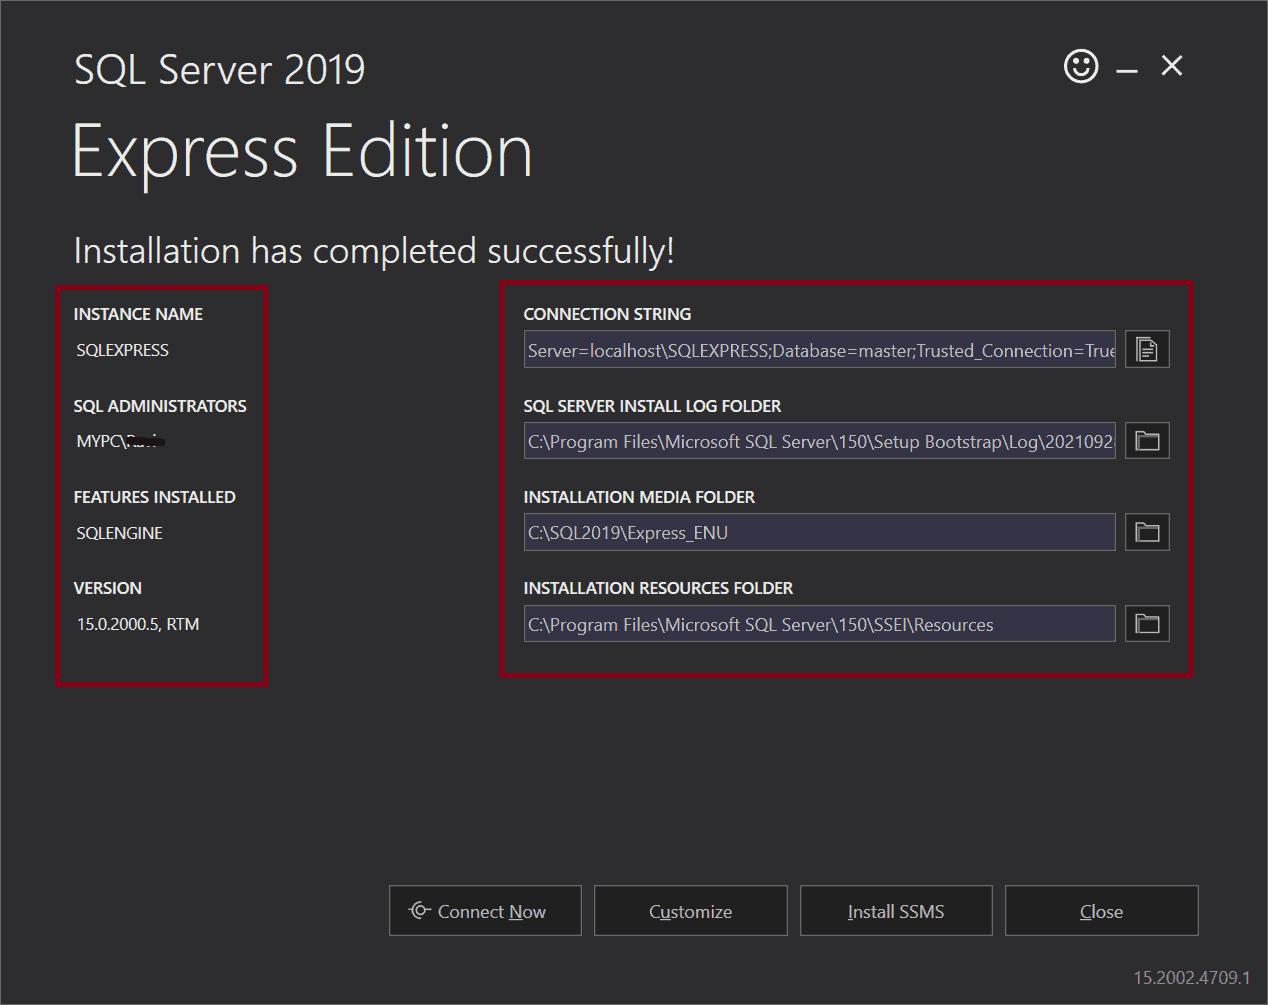
This is the last step of the installation wizard with four buttons.
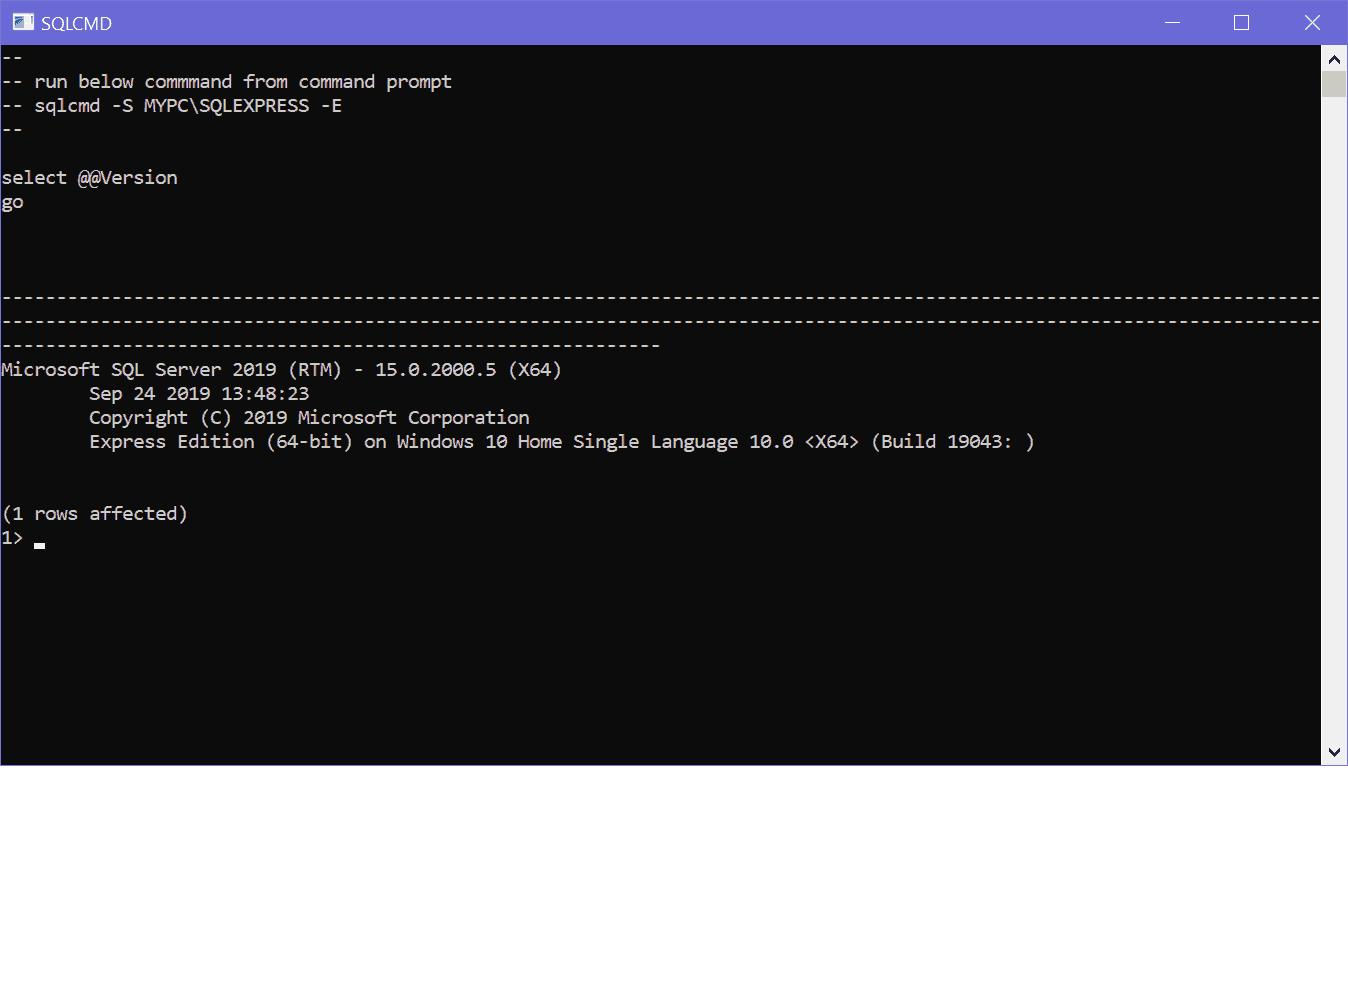
The Connect Now button will open a command-line window and executes the select @Version command to test the connection to this MSSQLSERVER instance.
The Customize button will open SQL Installation Center to add new features which were not in the default installation.
The Install SSMS button will install SQL Server Management Studio, which can be used to manage one or more SQL Server instances.
The Close button will close the installation wizard.
You will need SQL Server Management Studio (SSMS) to manage SQL Server databases on local or remote instances of SQL Server. It is recommended to install SSMS as the next step.
Install SQL Server Management Studio (SSMS)
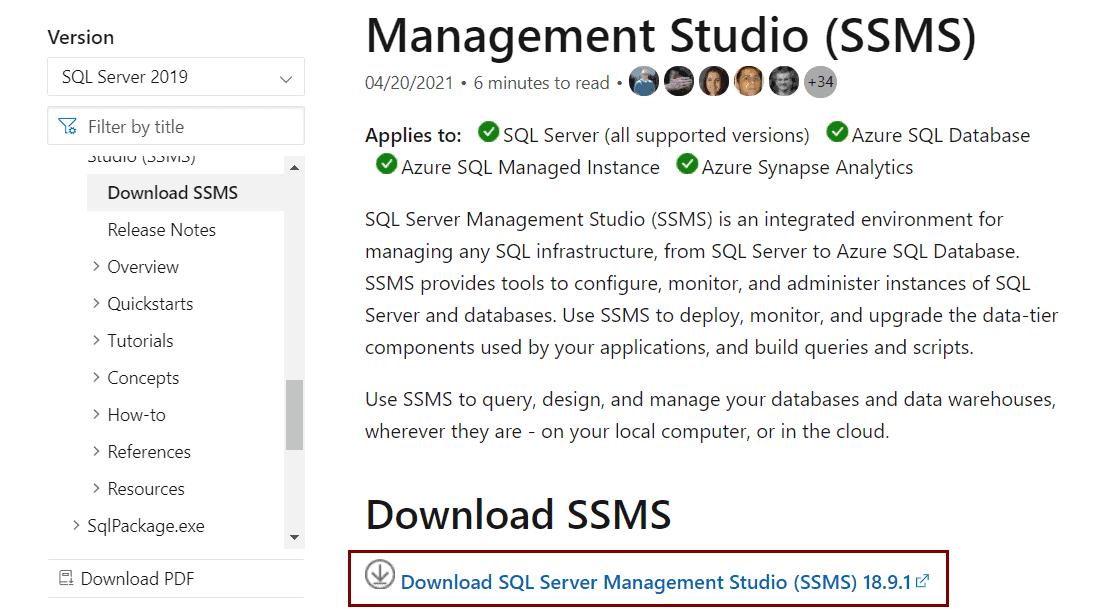
Click on the Install SSMS button on the last step of the SQL Server installation wizard, as shown above. It will open a webpage with a link to download SQL Server Management Studio.
Click on the link to download the latest SQL Server Management Studio (SSMS) link, as shown below.
Once the download is complete, go to the download folder in your system. Find the SSMS-Setup-ENU.exe and double click to install SSMS. Click the Yes button in the dialog box, which says, "Do you want this app to make changes to your device".
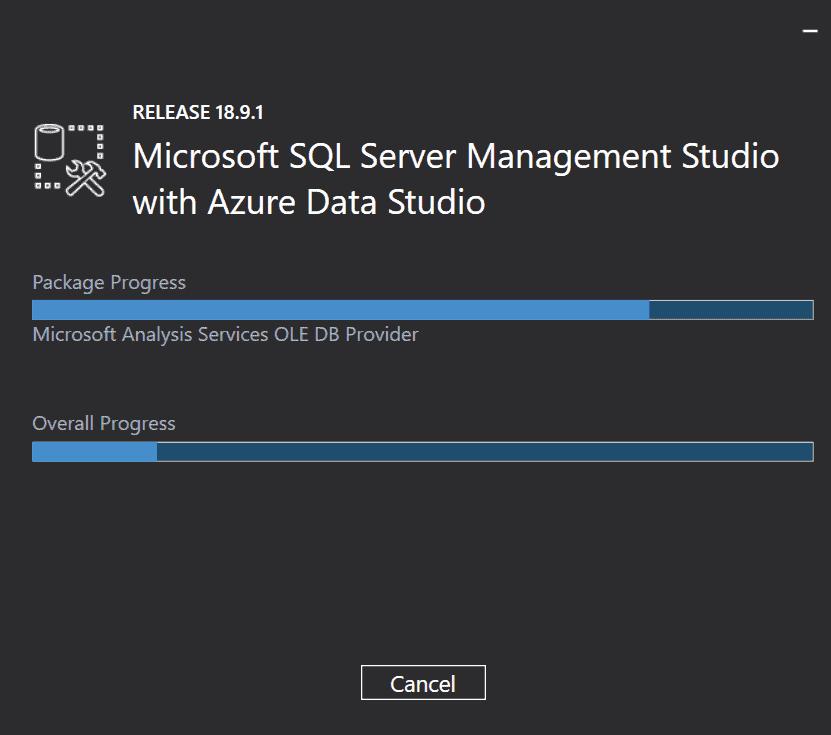
An SSMS (SQL Server Management Studio) installation wizard appears, as shown in the below figure.
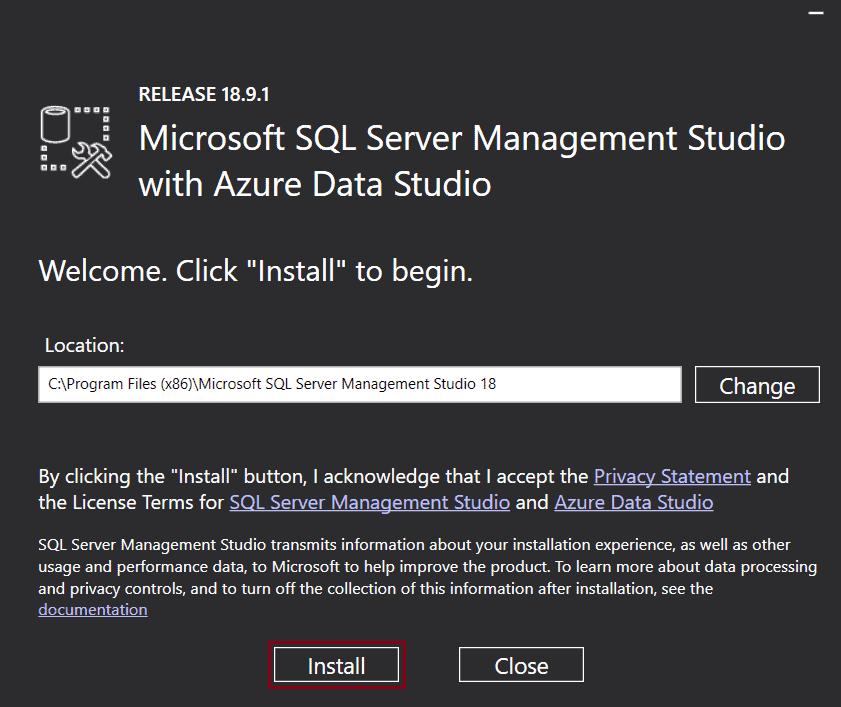
Click on the Install button to start installing SSMS while keeping the default installation location. It will download and install the required packages for SSMS. This will take a few minutes to complete the installation.
It will display the Seup Completed once the installation completed successfully, as shown below.

Now, to open SSMS, click on the Start menu and find Microsoft SQL Server Management Studio under Microsoft SQL Server Tools 18.

You can now start working with SQL Server 2019 using SQL Server Management Studio.
Learn how to use SSMS in the next chapter.