Connect to PostgreSQL Database using SQL Shell & pgAdmin
Here you will learn to connect to your PostgreSQL database with SQL Shell and pgAdmin tool.
Connect PostgreSQL Database using SQL Shell (psql)
SQL Shell is a command-line tool to connect and work with the PostgreSQL database. You can use it to create, alter, delete databases, tables, etc. in the PostgreSQL database.
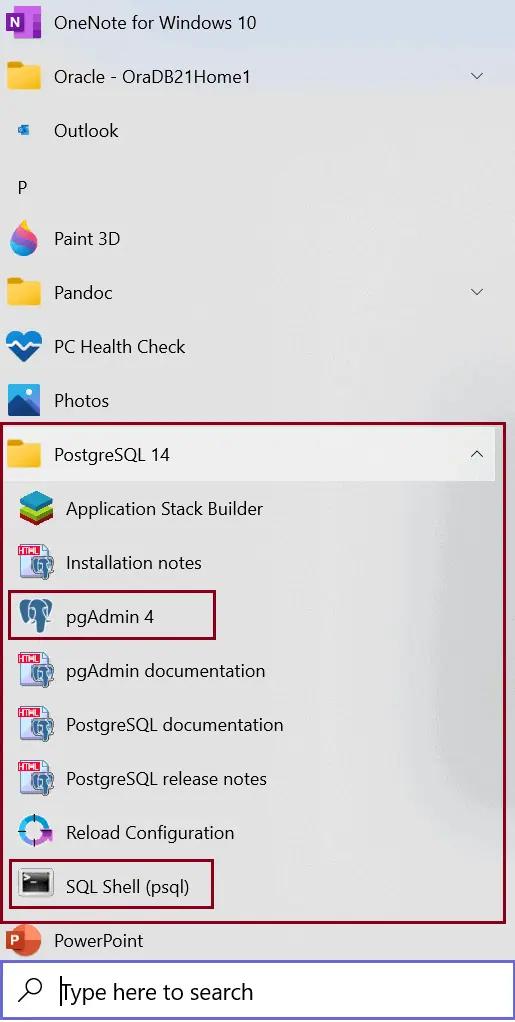
Let's connect to the default postgres database using SQL Shell (psql). On Windows, press Windows keys -> All apps -> PostgreSQL 14 -> click on SQL Shell (psql), as shown below.
This will launch SQL Shell (psql) command-line interface, as shown below.

First, you need to enter the PostgreSQL server name. if it is on your localhost then press Enter. The default value mentioned in the square bracket e.g. [localhost] is the default server.
Next, it will ask for the Database to connect to the server. Press Enter to connect with the default database named postgres. If you want to connect to another existing database then enter that name and press Enter.
Next, enter the port number on your server to connect. This was the port you gave at the time of installation.
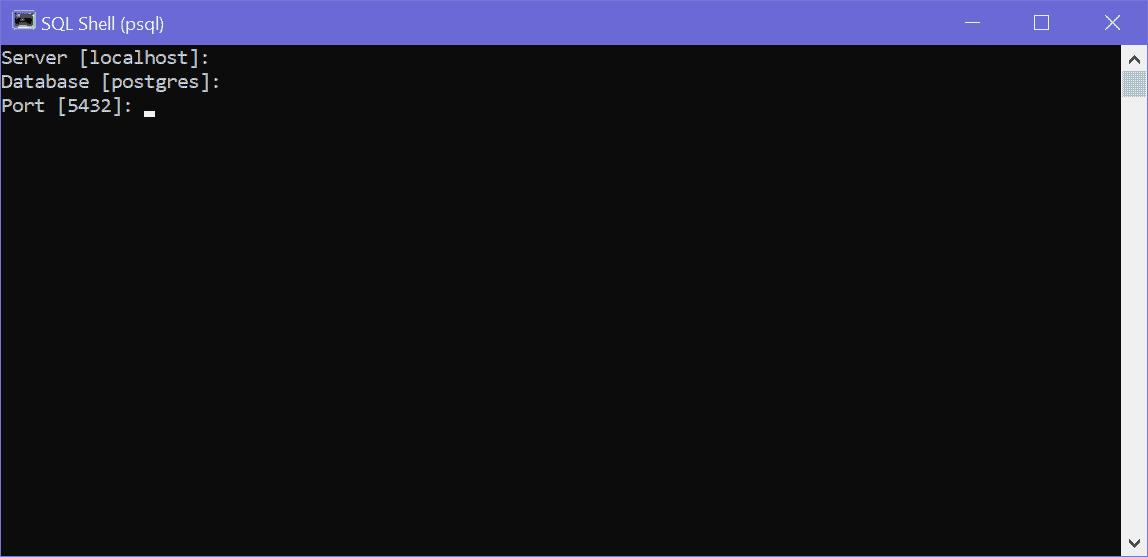
Press Enter to continue with the default port. Next, provide username and password to connect with the database.
The default username is postgres and enter a password that you gave during installation.
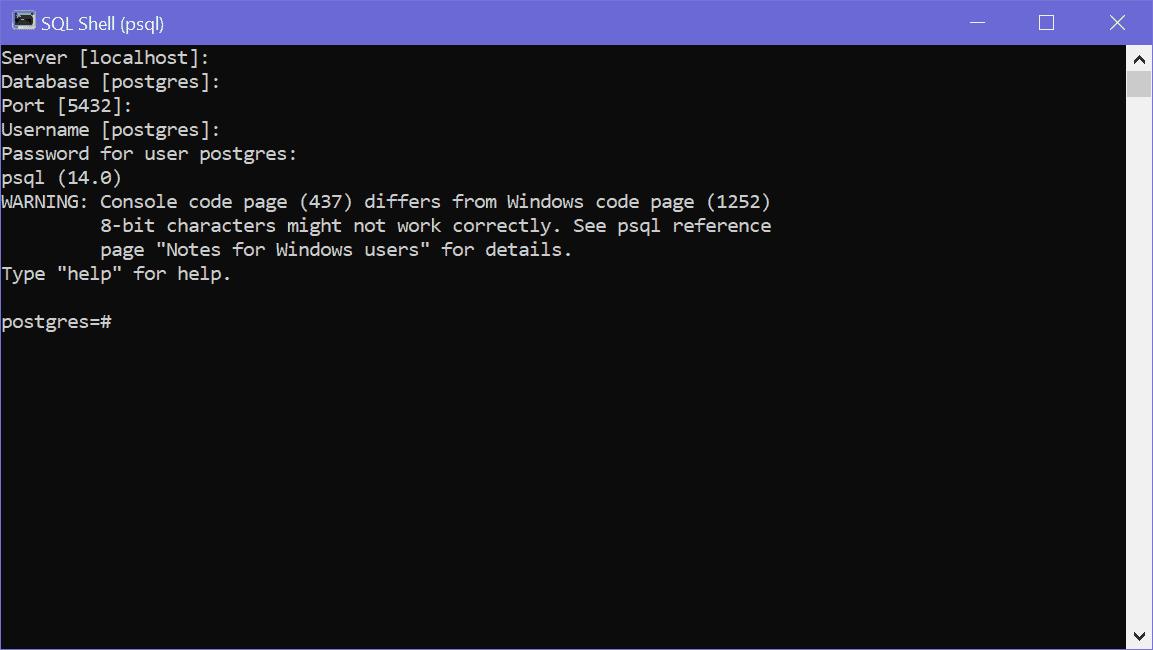
After providing the correct username and password, you will be connected to the postgres database, as shown below.
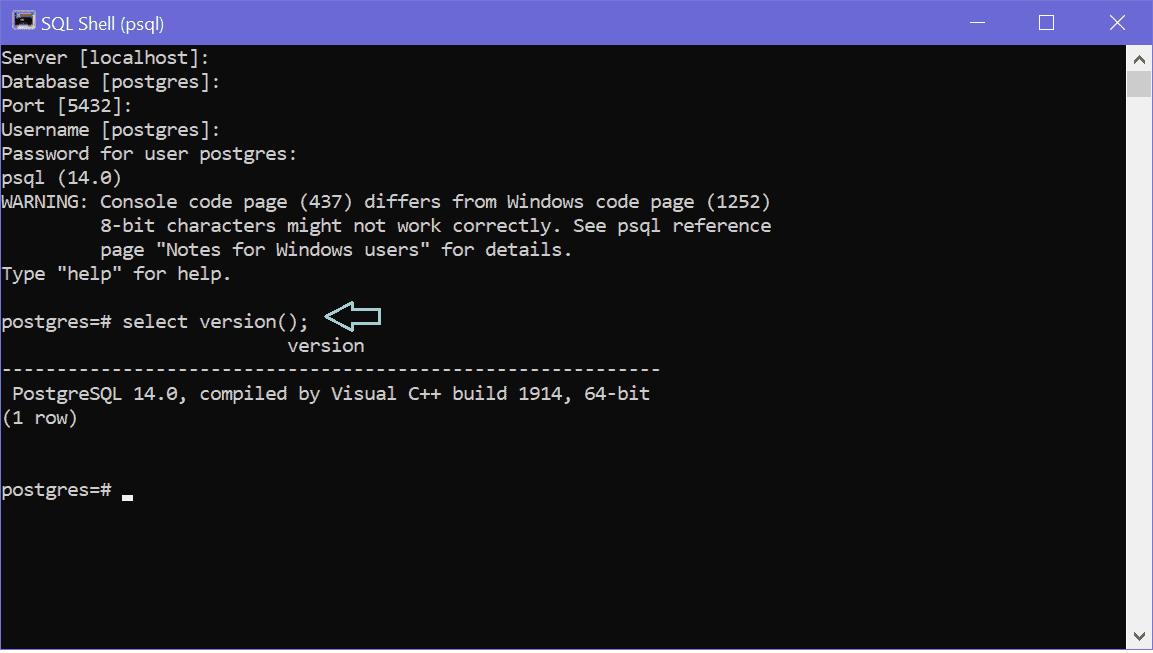
Now, let's validate the version of the database using SELECT version(); command, as shown below. This will show the currently installed version of PostgreSQL.
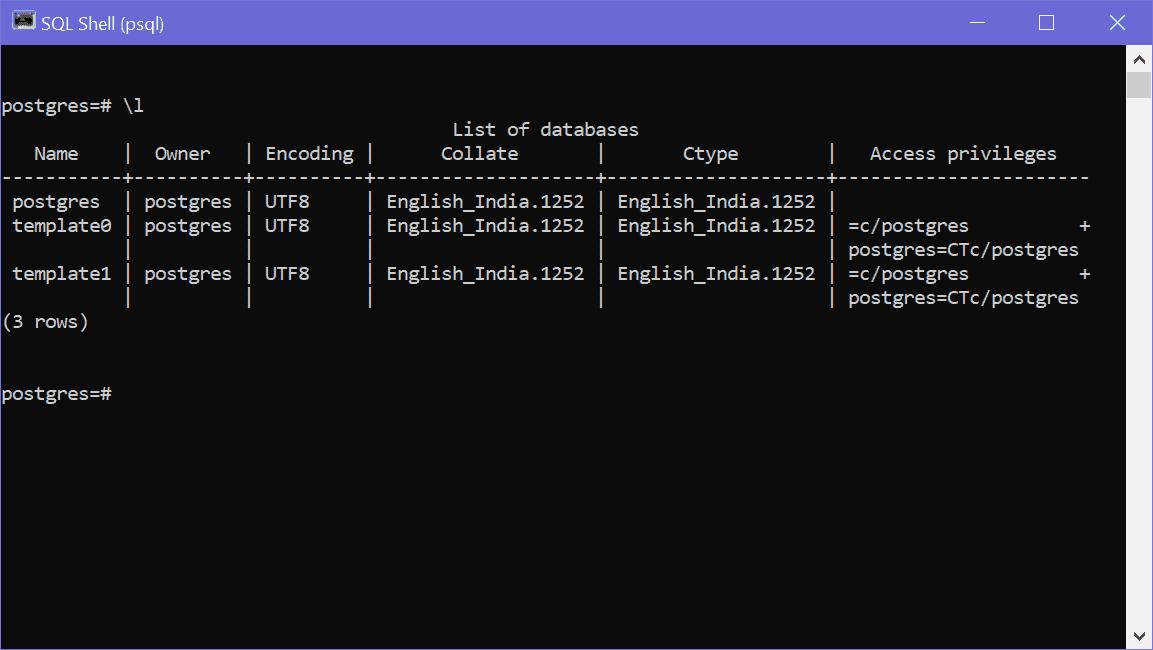
To check what all databases are there, enter \l command in psql, as shown below.
So, this is how you can connect to your PostgreSQL database with SQL Shell (psql) and start working.
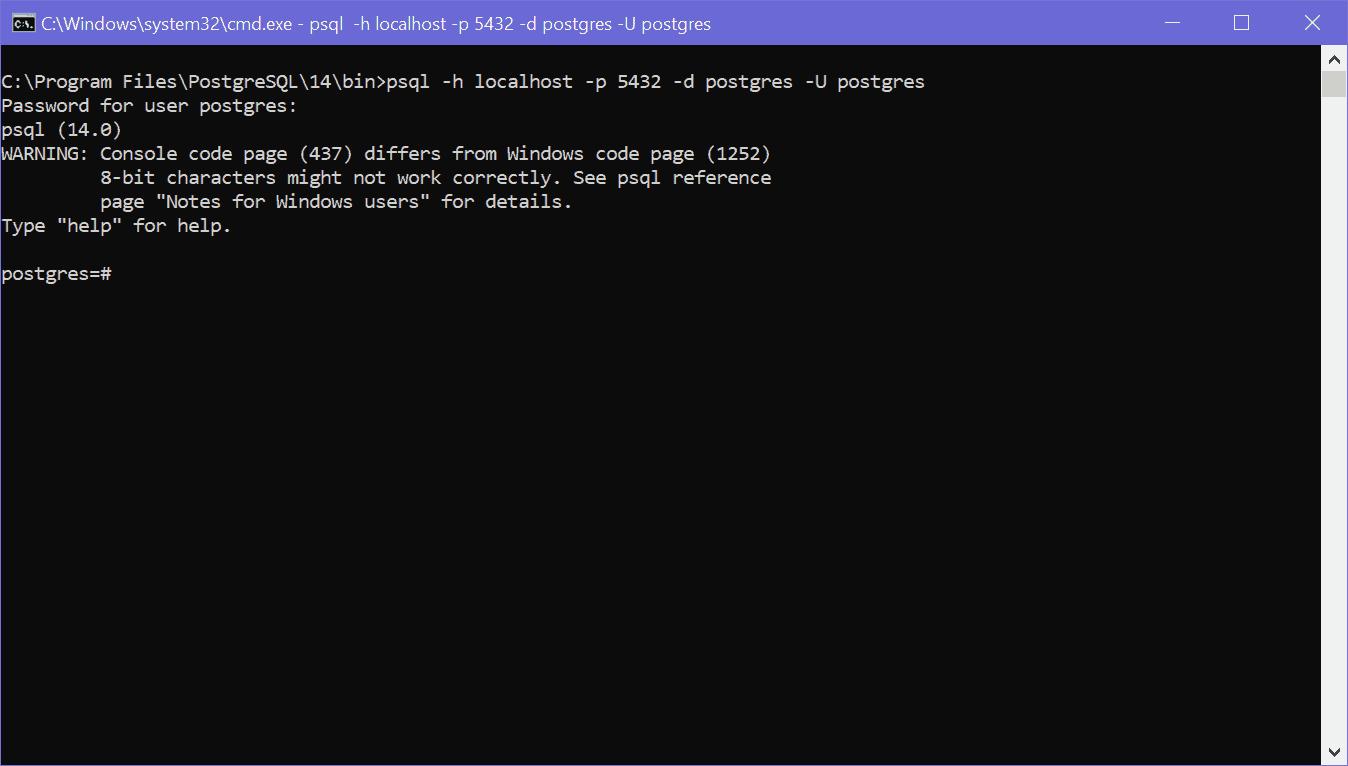
SQL Shell can be opened from the command prompt. Open a command prompt and navigate to your local C:\Program Files\PostgreSQL\14\bin and enter the following command. (you may enter this path to your environment variable)
psql -h localhost -p 5432 -d postgres -U postgresHere,
–h is host name
-p is port number
-d is database name
-U is for user name
It will prompt for the password, where you need to enter a password. It will connect you to postgres database as 'postgres' superuser.
Thus, you can connect to the PostgreSQL database using SQL Shell.
Connect to PostgreSQL using pgAdmin
The pgAdmin tool is installed as a part of PostgreSQL installation. It is GUI based tool that allows you to interact with PostgreSQL servers and databases.
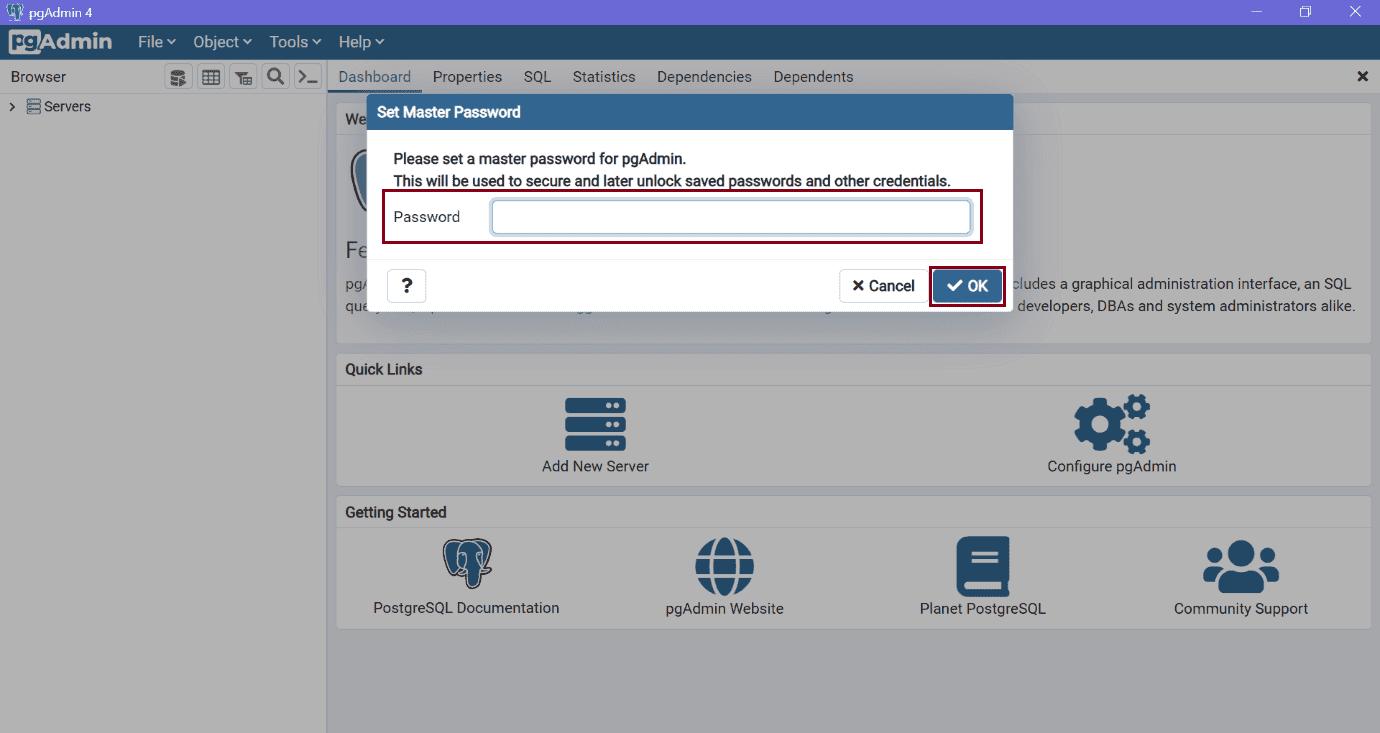
On Windows 10, search for pgAdmin and click on it to open it. It first asks for the master password. You can click on the Reset Master Password button to set it if you don't have it.
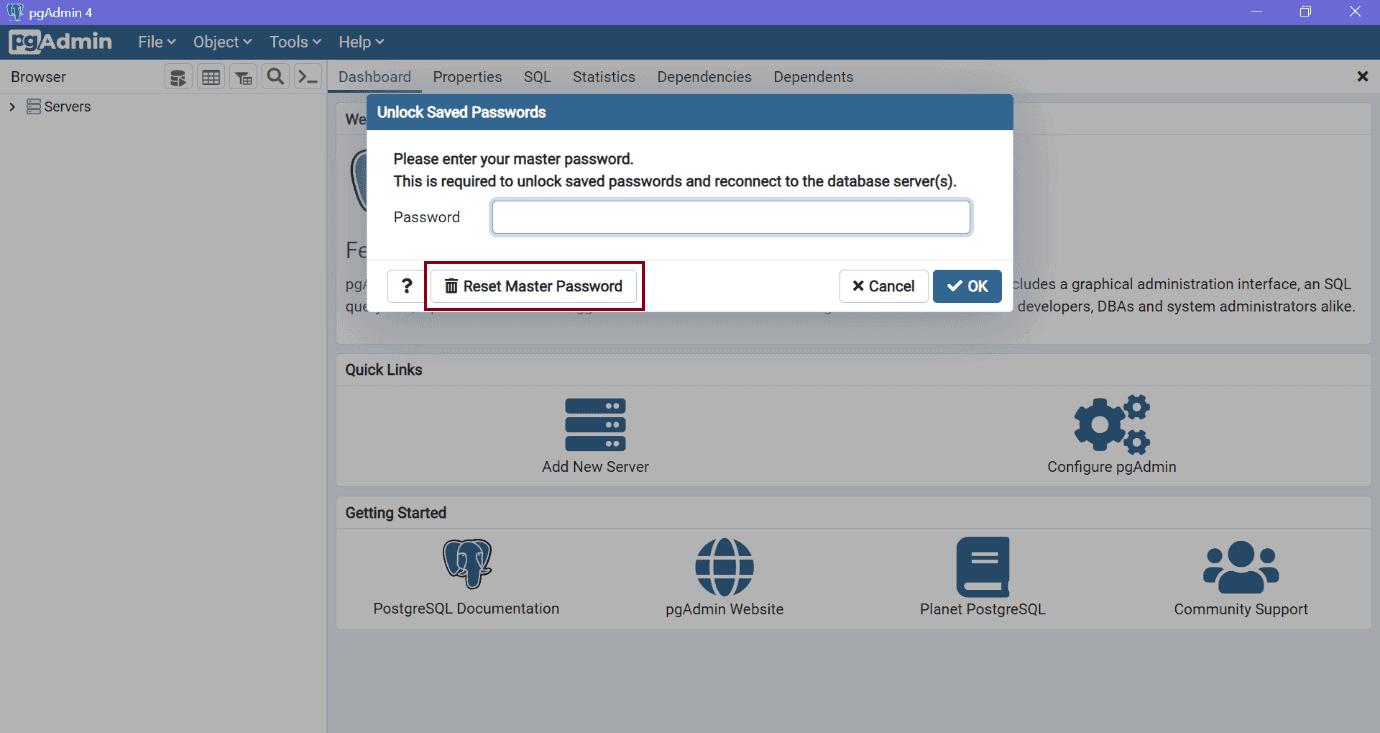
Clicking on Reset Master Password will open 'Set Master Password' dialog, as shown below. Here you can provide your master password and click OK.
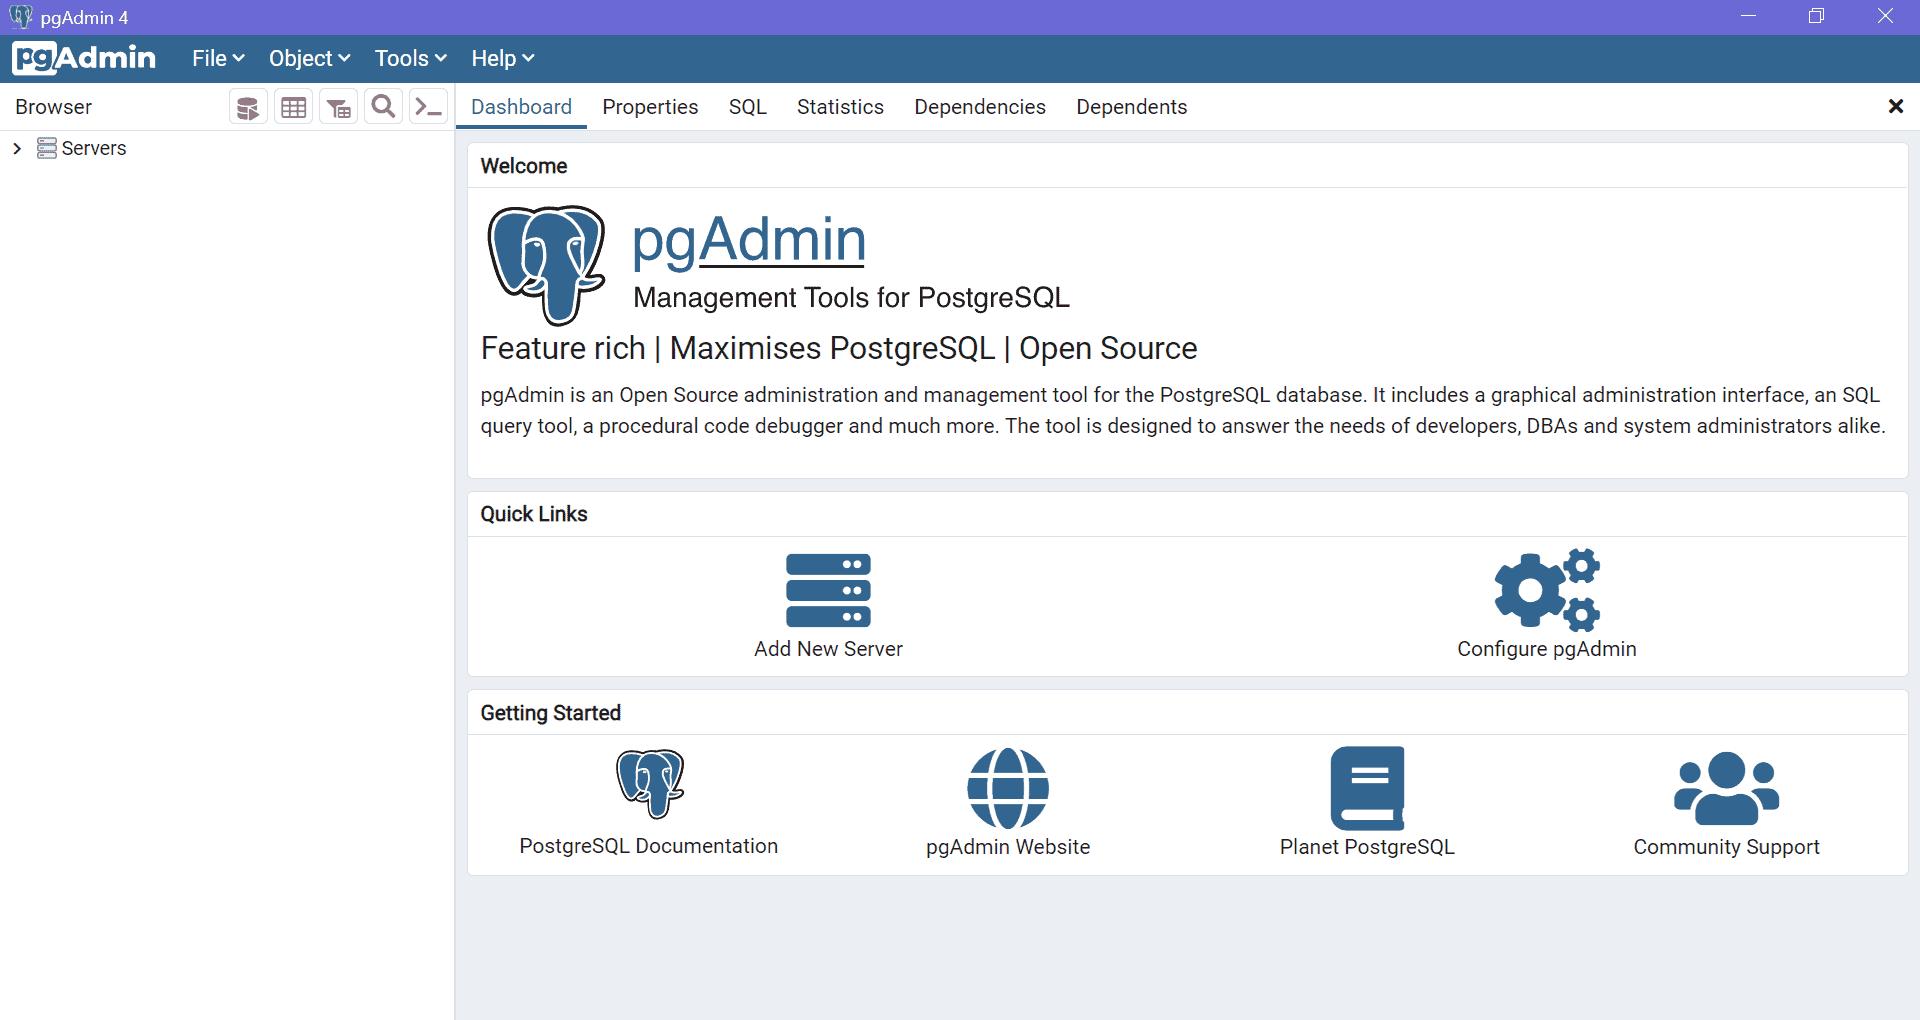
After setting the master password, the pgADmin will look like below.
Expand the Servers node in the left pane. This will ask for the password for the default 'postgres' superuser which you set during installation time.
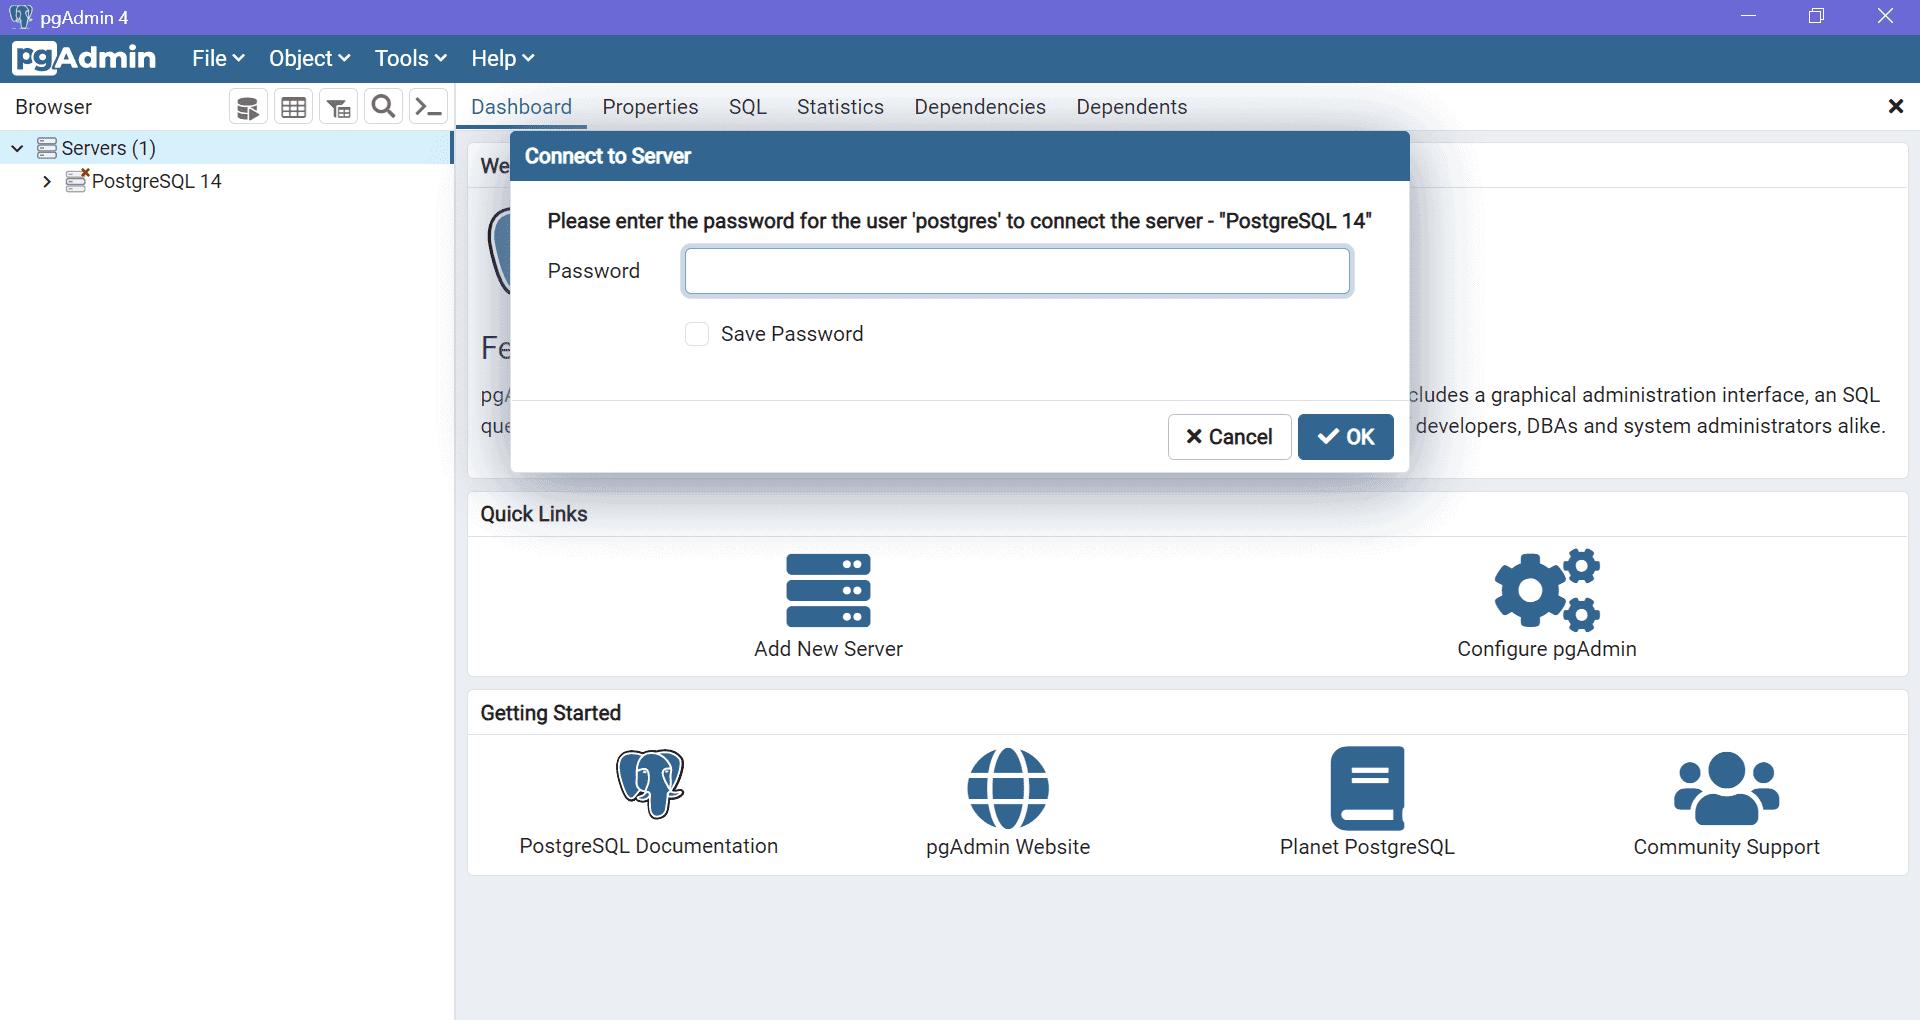
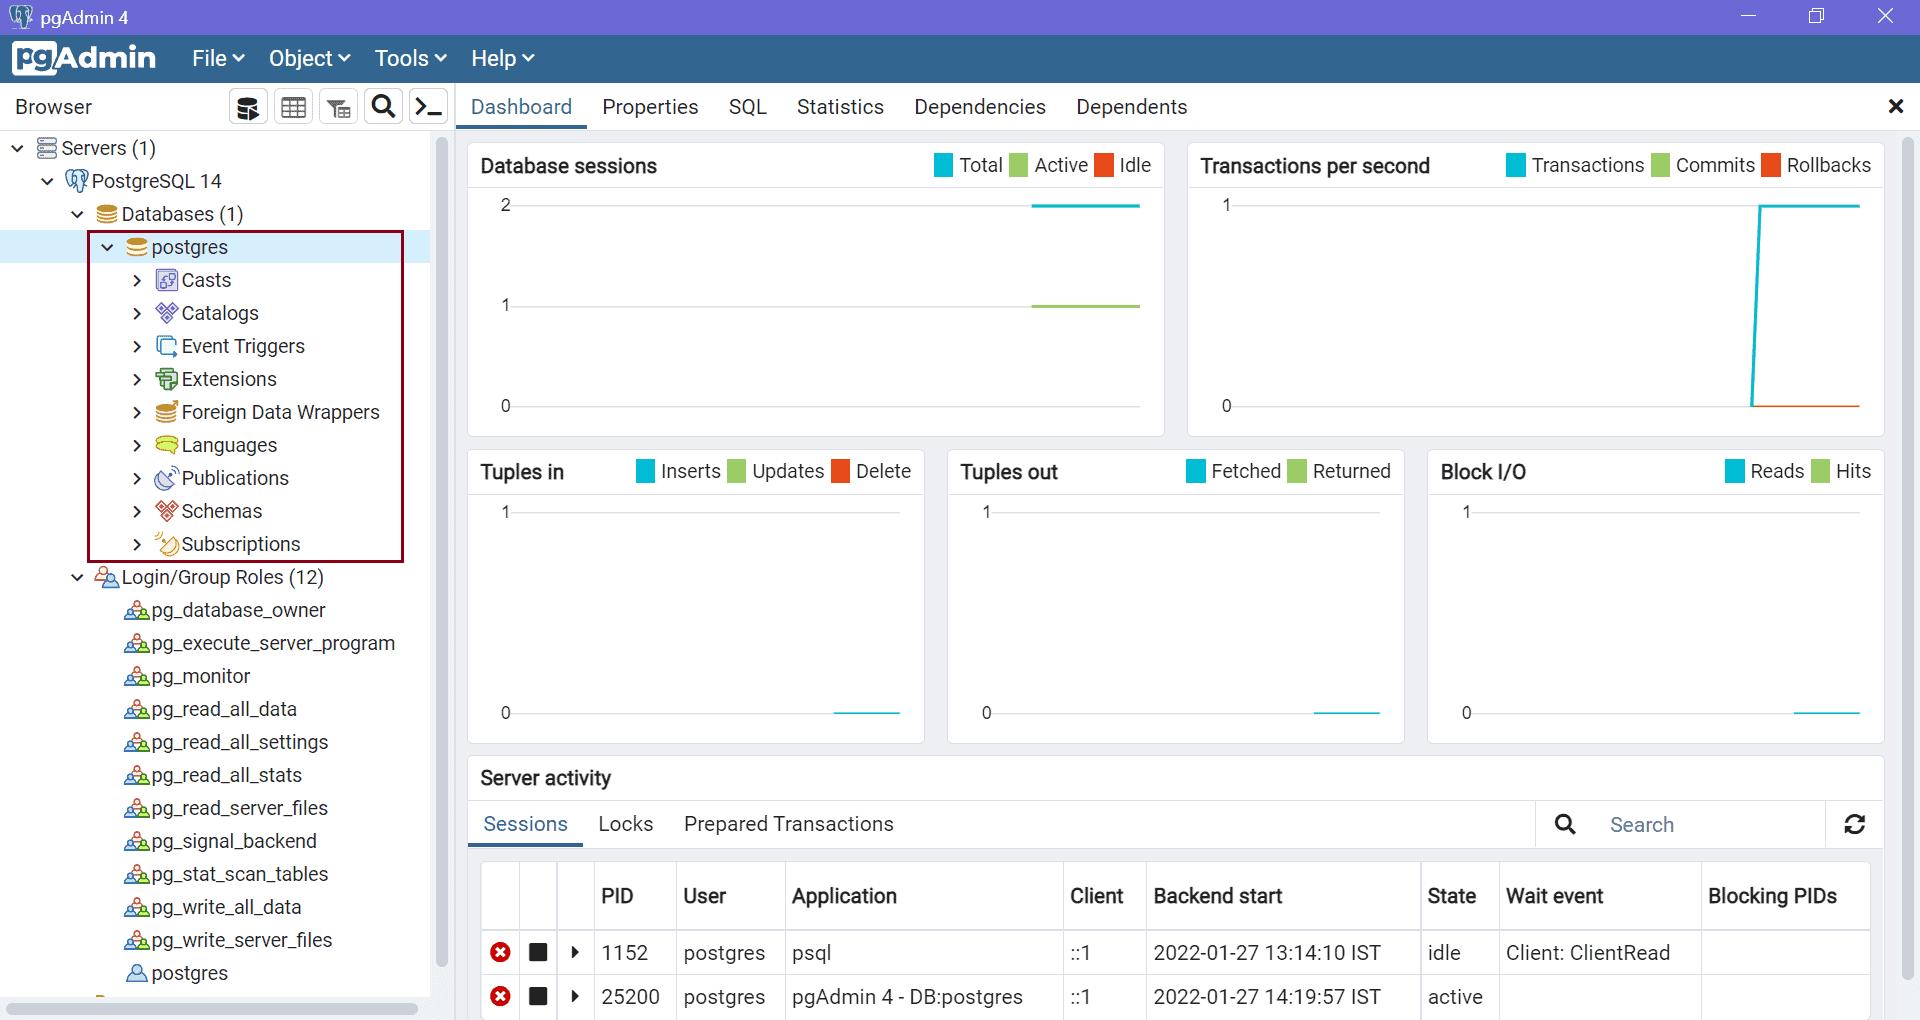
Enter the password for the user 'postgres' and click on OK button. This will expand the default server, which is PostgreSQL 14. It will show all the databases and Login/Group Roles in the left pane, as shown below.

As you can see above, it displays the default 'postgres' database. Click on it to see all the information about it on the right side pane.
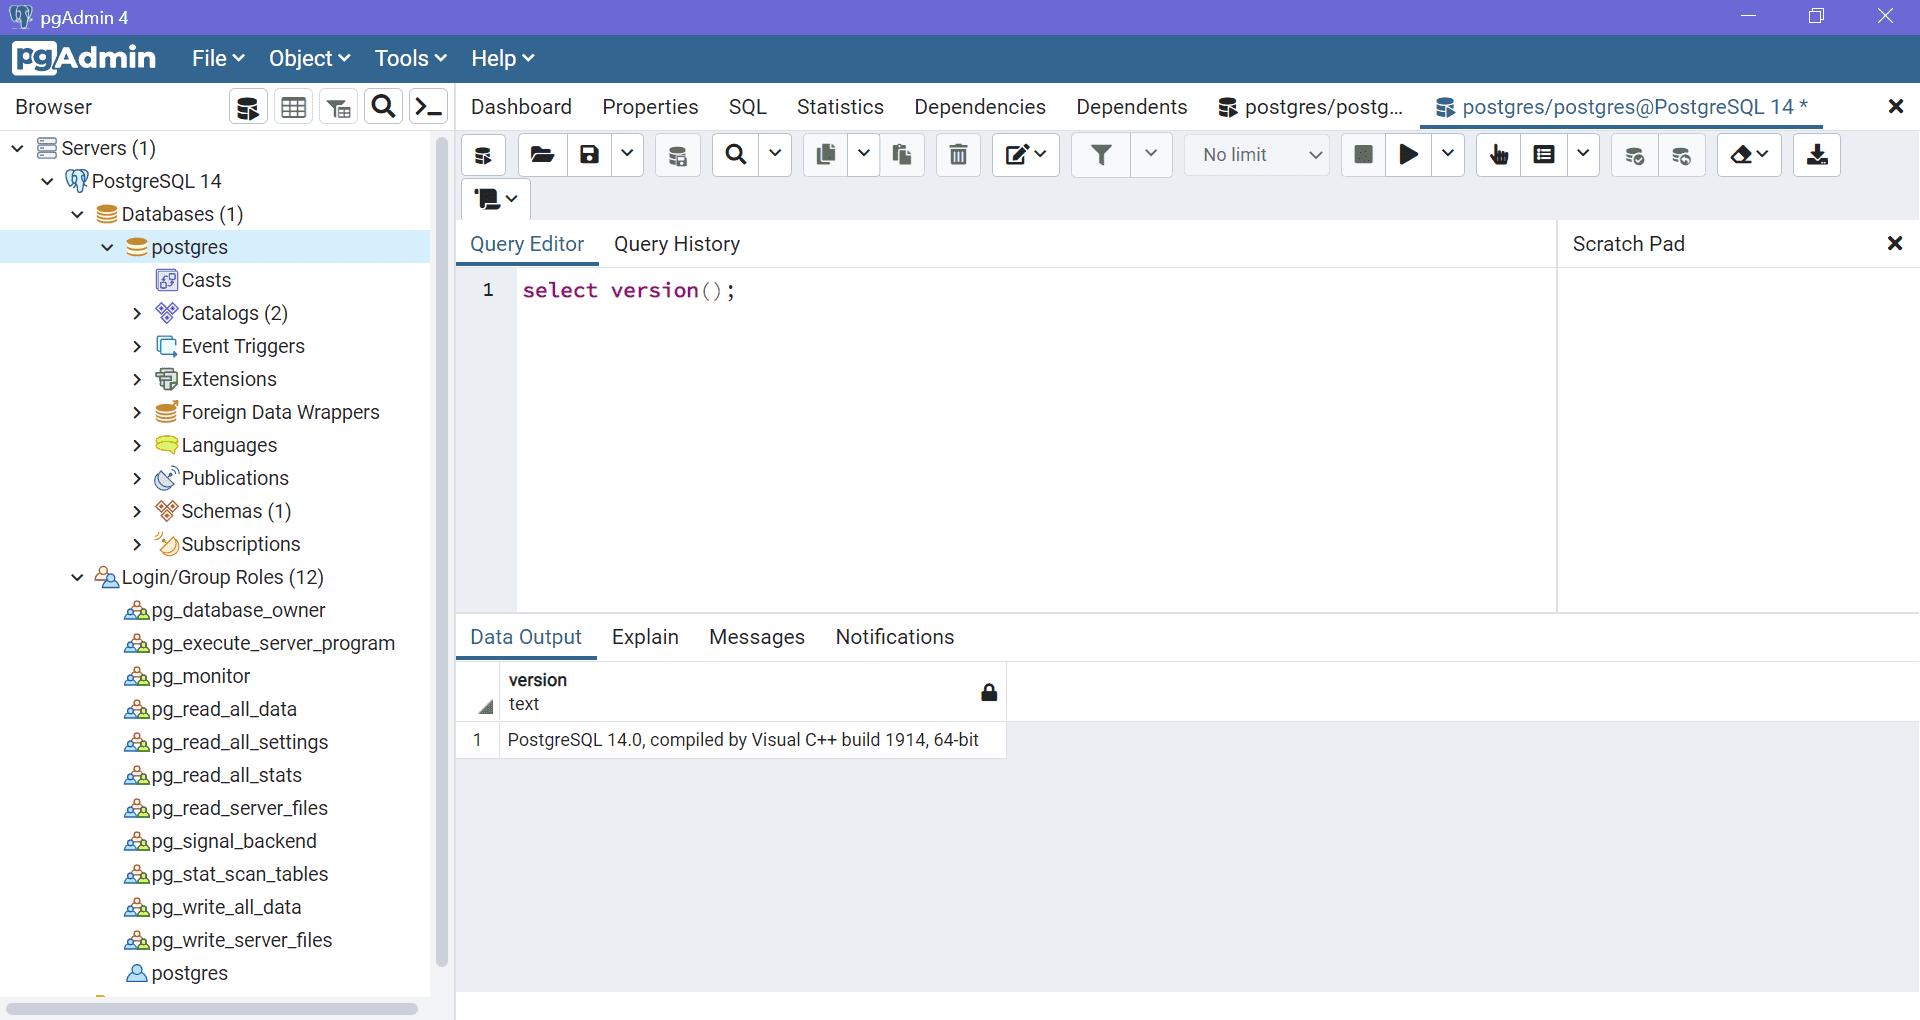
Open the query tool by clicking on Tools -> Query Tool or clicking on the bellow icon.
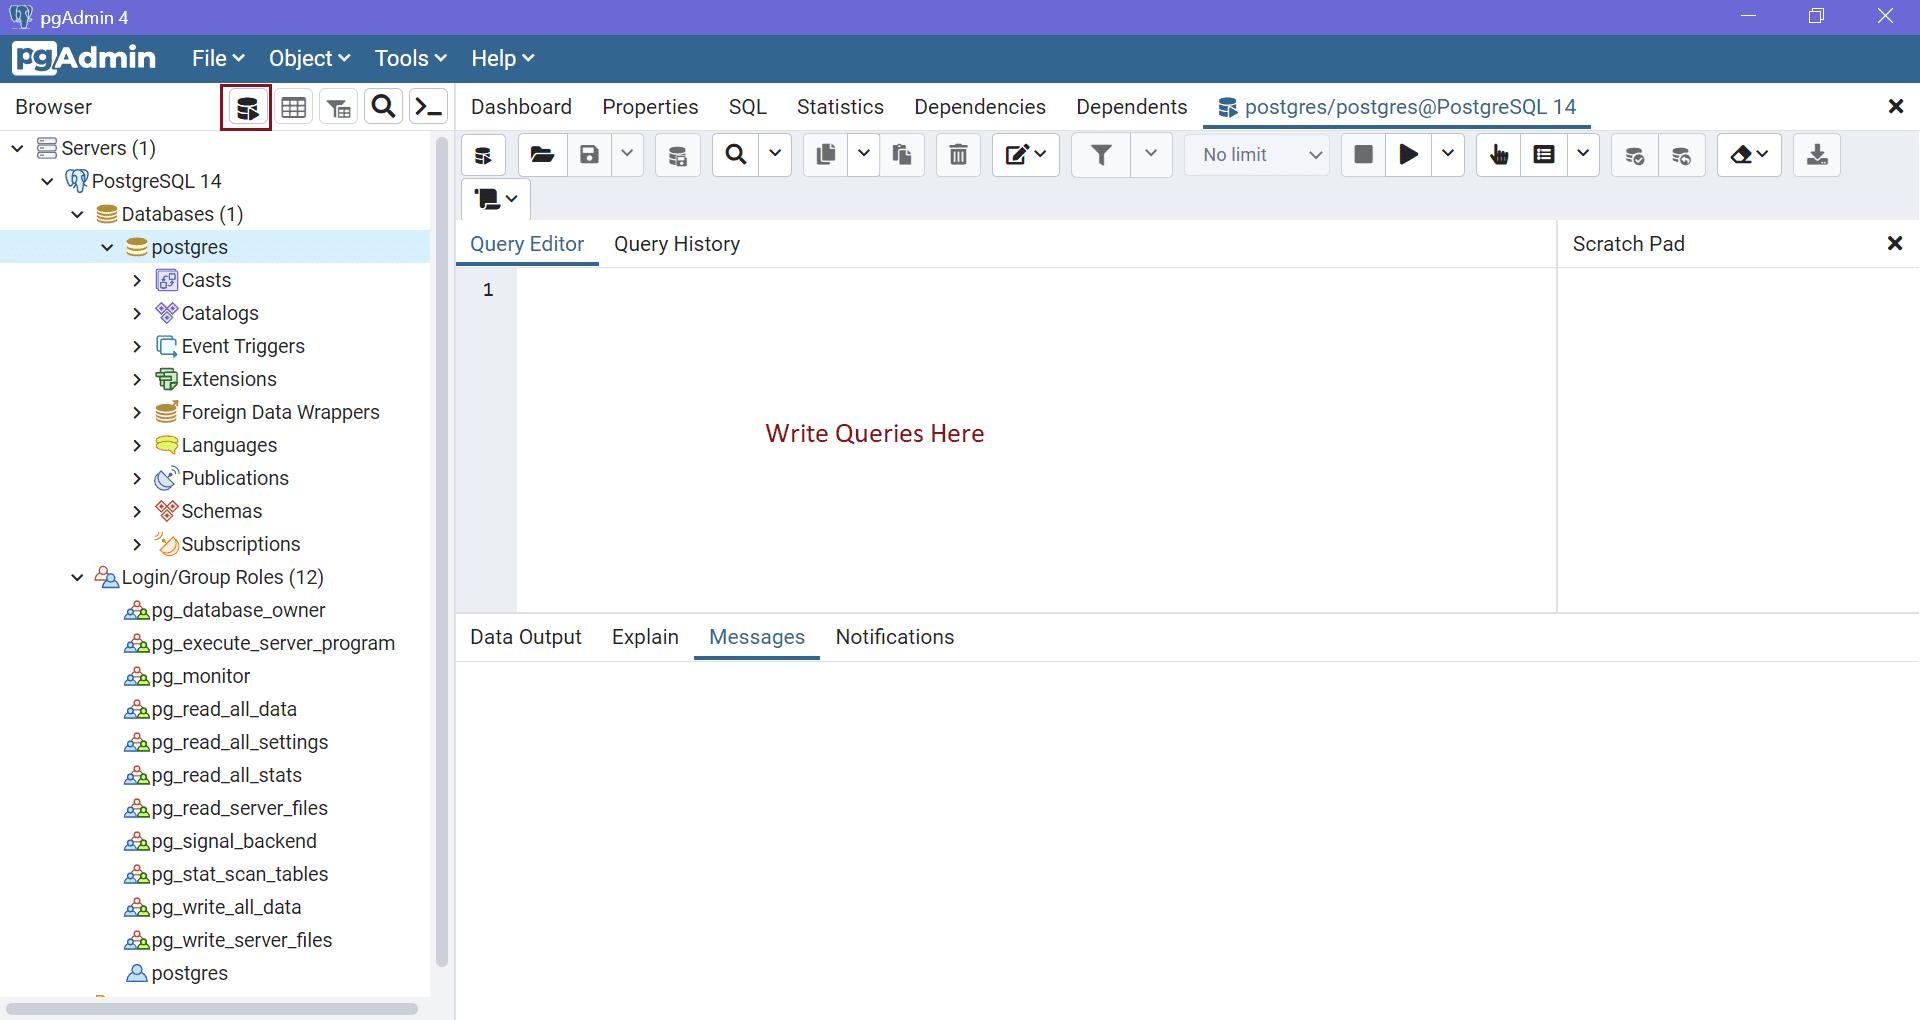
Write queries in Query Editor and click on the Execute button to execute a query against the connected database.
This is how you can use SQL Shell command-line tool or pgAdmin GUI tool to work with PostgreSQL databases.