Create UI in Python-Tkinter
Modern computer applications are user-friendly. User interaction is not restricted to console-based I/O. They have a more ergonomic graphical user interface (GUI) thanks to high speed processors and powerful graphics hardware. These applications can receive inputs through mouse clicks and can enable the user to choose from alternatives with the help of radio buttons, dropdown lists, and other GUI elements (or widgets).
Such applications are developed using one of various graphics libraries available. A graphics library is a software toolkit having a collection of classes that define a functionality of various GUI elements. These graphics libraries are generally written in C/C++. Many of them have been ported to Python in the form of importable modules. Some of them are listed below:
Tkinter is the Python port for Tcl-Tk GUI toolkit developed by Fredrik Lundh. This module is bundled with standard distributions of Python for all platforms.
PyQtis, the Python interface to Qt, is a very popular cross-platform GUI framework.
PyGTK is the module that ports Python to another popular GUI widget toolkit called GTK.
WxPython is a Python wrapper around WxWidgets, another cross-platform graphics library.
This tutorial explains the use of Tkinter in developing GUI-based Python programs.
Basic GUI Application
GUI elements and their functionality are defined in the Tkinter module. The following code demonstrates the steps in creating a UI.
from tkinter import *
window=Tk()
# add widgets here
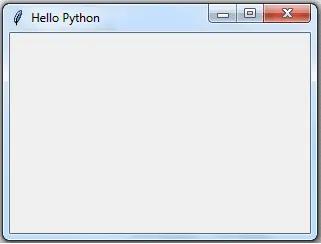
window.title('Hello Python')
window.geometry("300x200+10+20")
window.mainloop()First of all, import the TKinter module. After importing, setup the application object by calling the Tk() function. This will create a top-level window (root) having a frame with a title bar, control box with the minimize and close buttons, and a client area to hold other widgets. The geometry() method defines the width, height and coordinates of the top left corner of the frame as below (all values are in pixels): window.geometry("widthxheight+XPOS+YPOS")The application object then enters an event listening loop by calling the mainloop() method. The application is now constantly waiting for any event generated on the elements in it. The event could be text entered in a text field, a selection made from the dropdown or radio button, single/double click actions of mouse, etc. The application's functionality involves executing appropriate callback functions in response to a particular type of event. We shall discuss event handling later in this tutorial. The event loop will terminate as and when the close button on the title bar is clicked. The above code will create the following window:
All Tkinter widget classes are inherited from the Widget class. Let's add the most commonly used widgets.
Button
The button can be created using the Button class. The Button class constructor requires a reference to the main window and to the options.
Signature: Button(window, attributes)
You can set the following important properties to customize a button:
- text : caption of the button
- bg : background colour
- fg : foreground colour
- font : font name and size
- image : to be displayed instead of text
- command : function to be called when clicked
from tkinter import *
window=Tk()
btn=Button(window, text="This is Button widget", fg='blue')
btn.place(x=80, y=100)
window.title('Hello Python')
window.geometry("300x200+10+10")
window.mainloop()
Label
A label can be created in the UI in Python using the Label class. The Label constructor requires the top-level window object and options parameters. Option parameters are similar to the Button object.
The following adds a label in the window.
from tkinter import *
window=Tk()
lbl=Label(window, text="This is Label widget", fg='red', font=("Helvetica", 16))
lbl.place(x=60, y=50)
window.title('Hello Python')
window.geometry("300x200+10+10")
window.mainloop()
Here, the label's caption will be displayed in red colour using Helvetica font of 16 point size.
Entry
This widget renders a single-line text box for accepting the user input. For multi-line text input use the Text widget. Apart from the properties already mentioned, the Entry class constructor accepts the following:
- bd : border size of the text box; default is 2 pixels.
- show : to convert the text box into a password field, set show property to "*".
The following code adds the text field.
txtfld=Entry(window, text="This is Entry Widget", bg='black',fg='white', bd=5)
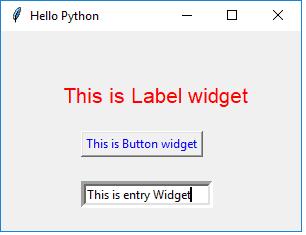
The following example creates a window with a button, label and entry field.
from tkinter import *
window=Tk()
btn=Button(window, text="This is Button widget", fg='blue')
btn.place(x=80, y=100)
lbl=Label(window, text="This is Label widget", fg='red', font=("Helvetica", 16))
lbl.place(x=60, y=50)
txtfld=Entry(window, text="This is Entry Widget", bd=5)
txtfld.place(x=80, y=150)
window.title('Hello Python')
window.geometry("300x200+10+10")
window.mainloop()
The above example will create the following window.
Selection Widgets
Radiobutton: This widget displays a toggle button having an ON/OFF state. There may be more than one button, but only one of them will be ON at a given time.
Checkbutton: This is also a toggle button. A rectangular check box appears before its caption. Its ON state is displayed by the tick mark in the box which disappears when it is clicked to OFF.
Combobox: This class is defined in the ttk module of tkinterpackage. It populates drop down data from a collection data type, such as a tuple or a list as values parameter.
Listbox: Unlike Combobox, this widget displays the entire collection of string items. The user can select one or multiple items.
The following example demonstrates the window with the selection widgets: Radiobutton, Checkbutton, Listbox and Combobox:
from tkinter import *
from tkinter.ttk import Combobox
window=Tk()
var = StringVar()
var.set("one")
data=("one", "two", "three", "four")
cb=Combobox(window, values=data)
cb.place(x=60, y=150)

lb=Listbox(window, height=5, selectmode='multiple')
for num in data:
    lb.insert(END,num)
lb.place(x=250, y=150)

v0=IntVar()
v0.set(1)
r1=Radiobutton(window, text="male", variable=v0,value=1)
r2=Radiobutton(window, text="female", variable=v0,value=2)
r1.place(x=100,y=50)
r2.place(x=180, y=50)

v1 = IntVar()
v2 = IntVar()
C1 = Checkbutton(window, text = "Cricket", variable = v1)
C2 = Checkbutton(window, text = "Tennis", variable = v2)
C1.place(x=100, y=100)
C2.place(x=180, y=100)

window.title('Hello Python')
window.geometry("400x300+10+10")
window.mainloop()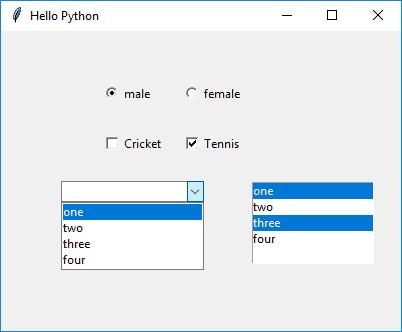
Event Handling
An event is a notification received by the application object from various GUI widgets as a result of user interaction. The Application object is always anticipating events as it runs an event listening loop. User's actions include mouse button click or double click, keyboard key pressed while control is inside the text box, certain element gains or goes out of focus etc.
Events are expressed as strings in <modifier-type-qualifier> format.
Many events are represented just as qualifier. The type defines the class of the event.
The following table shows how the Tkinter recognizes different events:
| Event | Modifier | Type | Qualifier | Action |
|---|---|---|---|---|
| <Button-1> | Button | 1 | Left mouse button click. | |
| <Button-2> | Button | 2 | Middle mouse button click. | |
| <Destroy> | Destroy | Window is being destroyed. | ||
| <Double-Button-1> | Double | Button | 1 | Double-click first mouse button 1. |
| <Enter> | Enter | Cursor enters window. | ||
| <Expose> | Expose | Window fully or partially exposed. | ||
| <KeyPress-a> | KeyPress | a | Any key has been pressed. | |
| <KeyRelease> | KeyRelease | Any key has been released. | ||
| <Leave> | Leave | Cursor leaves window. | ||
| <Print> | PRINT key has been pressed. | |||
| <FocusIn> | FocusIn | Widget gains focus. | ||
| <FocusOut> | FocusOut | widget loses focus. |
An event should be registered with one or more GUI widgets in the application. If it's not, it will be ignored. In Tkinter, there are two ways to register an event with a widget. First way is by using the bind() method and the second way is by using the command parameter in the widget constructor.
Bind() Method
The bind() method associates an event to a callback function so that, when the even occurs, the function is called.
Widget.bind(event, callback)
For example, to invoke the MyButtonClicked() function on left button click, use the following code:
from tkinter import *
window=Tk()
btn = Button(window, text='OK')
btn.bind('<Button-1>', MyButtonClicked)
The event object is characterized by many properties such as source widget, position coordinates, mouse button number and event type. These can be passed to the callback function if required.
Command Parameter
Each widget primarily responds to a particular type. For example, Button is a source of the Button event. So, it is by default bound to it. Constructor methods of many widget classes have an optional parameter called command. This command parameter is set to callback the function which will be invoked whenever its bound event occurs. This method is more convenient than the bind() method.
btn = Button(window, text='OK', command=myEventHandlerFunction)
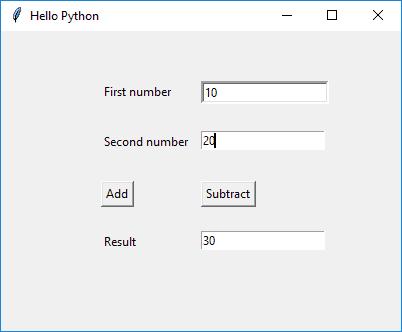
In the example given below, the application window has two text input fields and another one to display the result. There are two button objects with the captions Add and Subtract. The user is expected to enter the number in the two Entry widgets. Their addition or subtraction is displayed in the third.
The first button (Add) is configured using the command parameter. Its value is the add() method in the class. The second button uses the bind() method to register the left button click with the sub() method. Both methods read the contents of the text fields by the get() method of the Entry widget, parse to numbers, perform the addition/subtraction and display the result in third text field using the insert() method.
from tkinter import *
class MyWindow:
    def __init__(self, win):
        self.lbl1=Label(win, text='First number')
        self.lbl2=Label(win, text='Second number')
        self.lbl3=Label(win, text='Result')
        self.t1=Entry(bd=3)
        self.t2=Entry()
        self.t3=Entry()
        self.btn1 = Button(win, text='Add')
        self.btn2=Button(win, text='Subtract')
        self.lbl1.place(x=100, y=50)
        self.t1.place(x=200, y=50)
        self.lbl2.place(x=100, y=100)
        self.t2.place(x=200, y=100)
        self.b1=Button(win, text='Add', command=self.add)
        self.b2=Button(win, text='Subtract')
        self.b2.bind('<Button-1>', self.sub)
        self.b1.place(x=100, y=150)
        self.b2.place(x=200, y=150)
        self.lbl3.place(x=100, y=200)
        self.t3.place(x=200, y=200)
    def add(self):
        self.t3.delete(0, 'end')
        num1=int(self.t1.get())
        num2=int(self.t2.get())
        result=num1+num2
        self.t3.insert(END, str(result))
    def sub(self, event):
        self.t3.delete(0, 'end')
        num1=int(self.t1.get())
        num2=int(self.t2.get())
        result=num1-num2
        self.t3.insert(END, str(result))

window=Tk()
mywin=MyWindow(window)
window.title('Hello Python')
window.geometry("400x300+10+10")
window.mainloop()
The above example creates the following UI.
Thus, you can create the UI using TKinter in Python.